Select the Reverse Engineering Options
You can create a data model from a database or a script using the Reverse Engineering process. The reverse engineering wizard allows you to select the objects that you want to include in the model. However, when you reverse engineer from a script, these options are overridden and all the objects are reverse engineered.
The tool builds its models by querying the system catalog of the database, rather than querying the specific objects. You must have read and write permissions on all the objects that you want to reverse engineer.
This topic walks you through the steps to reverse engineer a MongoDB model as an example. Similarly, you can reverse engineer a list of databases into models based on your requirements. For more information on database specific reverse engineering options, refer to Reverse Engineering Options for Databases.
To reverse engineer successfully from an Oracle database, ensure that you have configured the following minimum permissions:
Grant connect to <Username>;
Grant select_catalog_role to <Username>;.
Also, if you have added tables to the database after reverse engineering a model from it, ensure that you do not select any specific tables after selecting a schema on the reverse engineering wizard.
To reverse engineer a model:
-
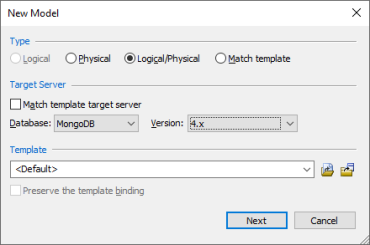
In erwin Data Modeler (DM), click Actions > Reverse Engineer.
The New Model screen appears.
-
Click Logical/Physical and set a Database.
-
Click Next.
The Reverse Engineering Wizard appears.
-
Click one of the following options:
-
Database: Use this option to reverse engineer a model from a database.
If you click Database, continue to step 5.
-
Script File: Use this option to reverse engineer a model from a script. Selecting this option enables the File field. Click Browse and select the a script file from your directory.
If you click Script File, go to step 8 below and ensure that Document Count or Document % is not set to zero (0).
-
-
Click Next.
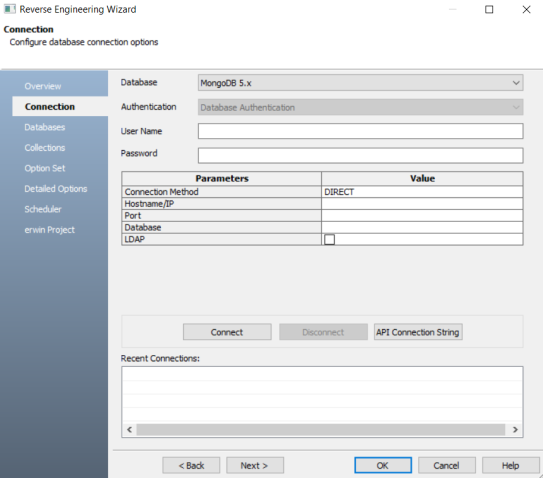
The Connection tab for a database appears. Use this section to connect to the database for reverse engineering models. You can connect to the database directly or using a connection string. Similarly, for other database types, you can use JDBC, ODBC, or other connection methods based on your requirement.
For more information, refer to the Database Connection Parameters topic or Reverse Engineering Options for Databases.
In the following image, for example, the connection is being established using a connection string.
-
Click Connect.
On a successful connection, your connection information is displayed under Recent Connections.
-
Click Next.
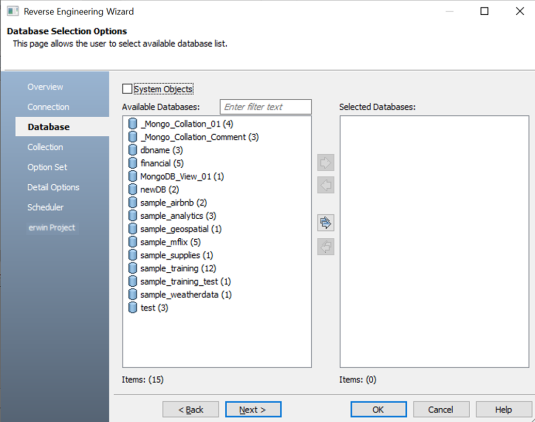
The Database tab appears. It displays a list of available databases. Similarly, for other databases, it displays database specific section for object selection.
-
Under Available Databases, select the databases that you want to reverse engineer. Then, click
 .
.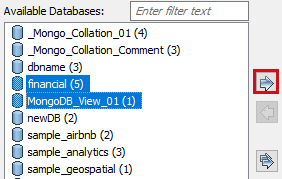
This moves the selected databases under Selected Databases.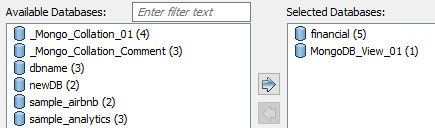
-
Click Next.
The Collection tab appears. It displays a list of available collections in the databases that you selected in step 8.
Similarly, for other databases, it displays database specific section for object selection.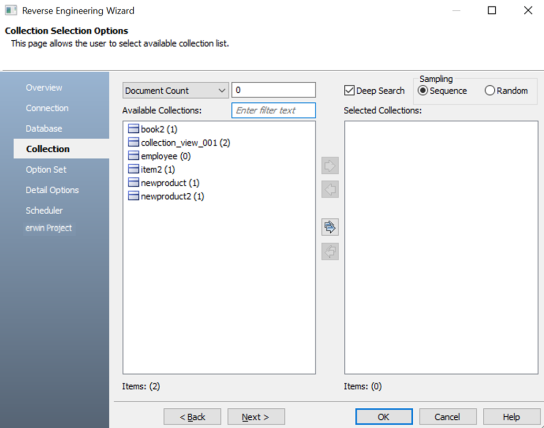
-
Use the following options:
-
Document Count/Document (%): Use this option to specify the number of documents or percentage of total records that the newly generated model schema would contain.
-
Deep Search: Use this option to specify whether the deep search algorithm is used to retrieve the right samples for schema generation.
-
Sampling: Use the Sequence or Random sampling methods to sample records in the selected collections. Sampling enables you to retrieve right estimates for accurate collection schema generation.
-
-
Under Available Collections, select the collections that you want to reverse engineer. Then, click
.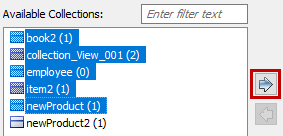
This moves the selected collections under Selected Collections.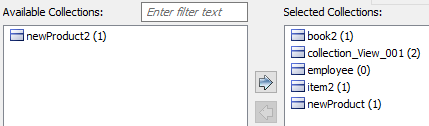
-
Click Next.
The Option Set tab appears. It displays the default option set. You can either use the default or a custom option set.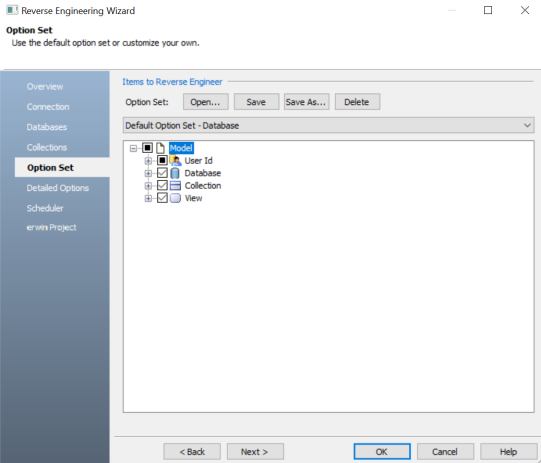
-
Click Next.
The Detail Options tab appears. Set up appropriate options based on your requirement.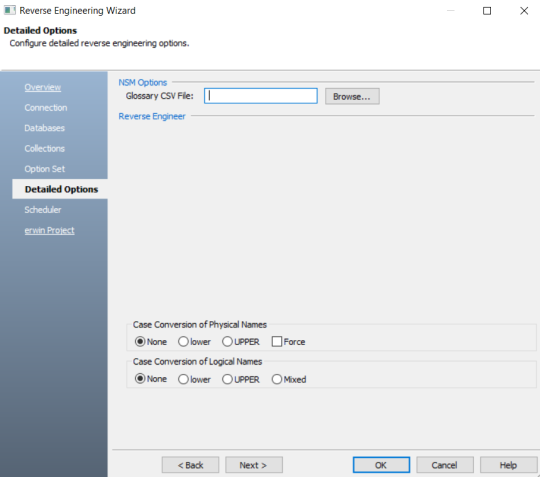
-
Click Next.
The Scheduler tab appears. Set up the scheduler options on this section.The Scheduler is available only when you schedule a reverse engineering job using erwin DM Scheduler.
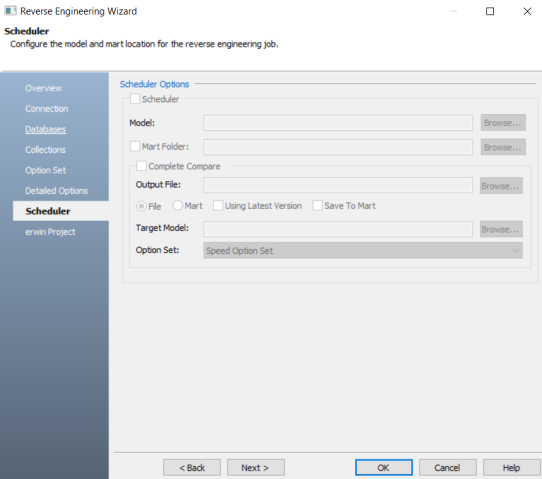
-
Click OK.
The reverse engineering process starts.
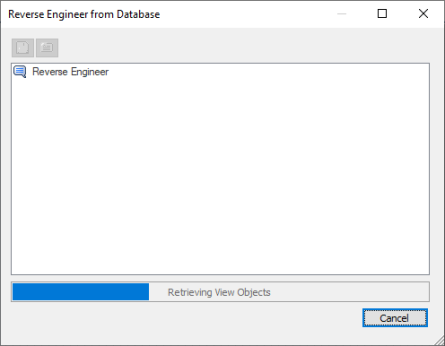
Once the process is complete, based on your selections, a schema is generated and a model is created.
Reverse Engineering Options for Databases
For database specific reverse engineering options, refer the following:
|
Copyright © 2025 Quest Software, Inc. |