You can add database models into the project by reverse engineering an existing database or a script.
To add a model into the project by reverse engineering, follow these steps:
- Right-click the folder to which the model must be added and select Reverse Engineer.
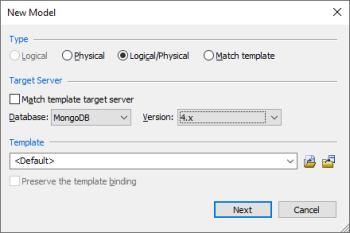
- Select the model type.
- Select the required database and version and click Next.
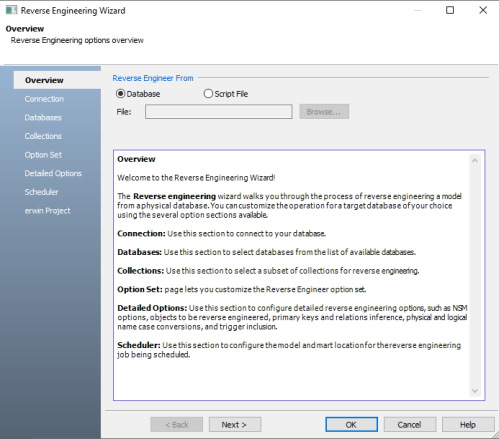
- Enter appropriate values in the Overview, Connection, Databases, Collections, Option Set, Detailed Options, and Scheduler tabs. For more information, refer to the Select the Reverse Engineering Options topic.
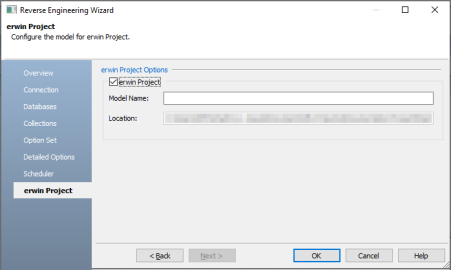
- Select the erwin Project tab in the Reverse Engineering Wizard.
- Enter appropriate values in the fields. Refer to the following table for field descriptions.
- Click OK.
The New Model window appears.

The Reverse Engineering Wizard appears.

The erwin Project Options section appears.

| Field | Description |
|---|---|
| erwin Project | Specifies whether the model must be added to the project |
| Model Name | Specifies a name for the model |
| Location | Specifies the storage location of the model. This field is auto-populated. |
The model is added to the selected folder, and opens in the Diagram window.
|
Copyright © 2025 Quest Software, Inc. |