This topic walks you through the steps to schedule a reverse engineering job with a MongoDB model as an example. Similarly, you can schedule a reverse engineering job from any other databases.
For more information on database specific connection parameter options, refer to Database Connection Parameters topic. For database-specific reverse engineering options, refer to the Reverse Engineering Options for Databases section.
If you rerun an existing job after adding tables to the corresponding database, ensure that you either do not select any specific tables after selecting a schema on the reverse engineering wizard or edit job properties before running the job again.
When you click the Reverse Engineer option on the erwin DM Scheduler Event Details page, the Reverse Engineering Wizard appears.
To set up revere engineering options, follow these steps:
-
On the erwin DM Scheduler Events Details screen, click Reverse Engineer.
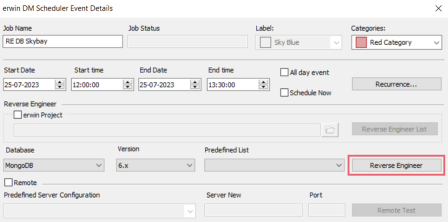
The Reverse Engineering Wizard appears.
-
Click one of the following options:
-
Database: Use this option to reverse engineer a model from a database.
If you click Database, continue to step 5.
-
Script File: Use this option to reverse engineer a model from a script. Selecting this option enables the File field. Click Browse and select the a script file from your directory.
If you click Script File, go to step 8 below and ensure that Document Count or Document % is not set to zero (0).
-
-
Click Next.
The Connection tab appears.The available connection options differ based on your database. For more information on database-specific connection parameters, refer to the Database Connection Parameters topic.
For example, the following image the connection to MongoDB database is established using a connection string.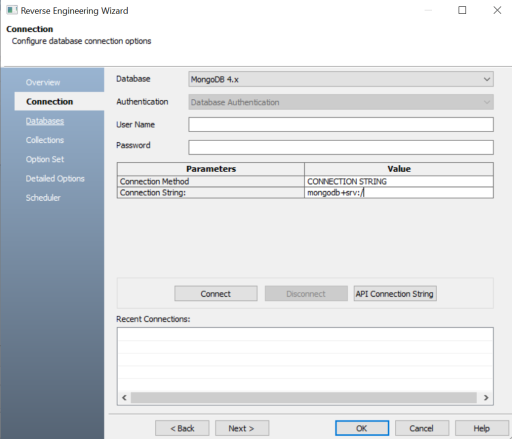
On a successful connection, your connection information is displayed under Recent Connections.
Click the API Connection String button to view the API connection string for your database. For more information, refer to the ISCPersistenceUnit::ReverseEngineer topic in the API Reference guide.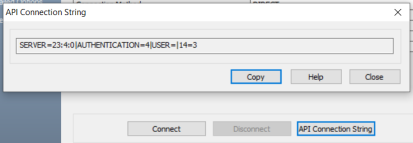
-
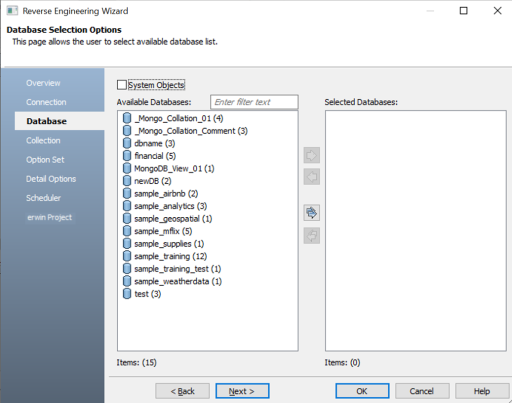
Click Next.
The Database tab appears. The available options differ based on your database. For more information on database-specific reverse engineering options, refer to the Reverse Engineering Options for Databases topic.The Database section appears. It displays a list of available databases.
-
Under Available Databases, select the databases that you want to reverse engineer. Then, click
 .
. 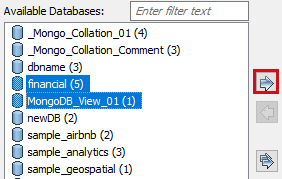
This moves the selected databases under Selected Databases.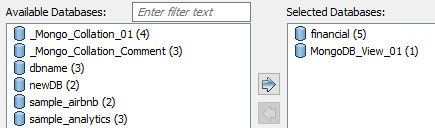
-
Click Next.
The Collection section appears. It displays a list of available collections in the selected.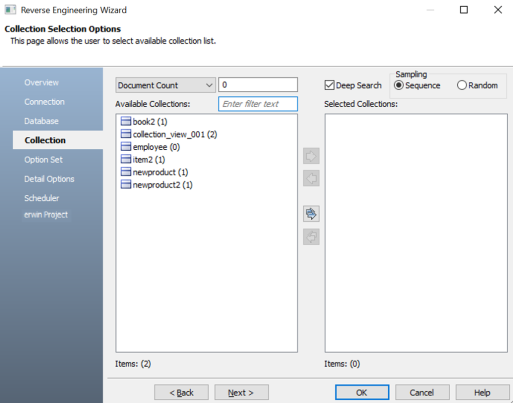
-
Use the following options:
-
Document Count/Document (%): Use this option to specify the number of documents or percentage of total records that the newly generated model schema would contain.
-
Deep Search: Use this option to specify whether the deep search algorithm is used to retrieve the right samples for schema generation.
-
Sampling: Use the Sequence or Random sampling methods to sample records in the selected collections. Sampling enables you to retrieve right estimates for accurate collection schema generation.
-
-
Under Available Collections, select the collections that you want to reverse engineer. Then, click
.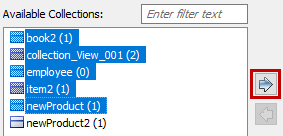
This moves the selected collections under Selected Collections.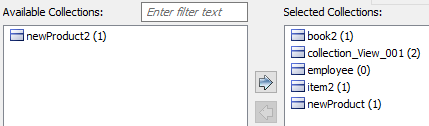
-
Click Next.
The Option Set tab appears. It displays the default option set. You can either use the default or a custom option set.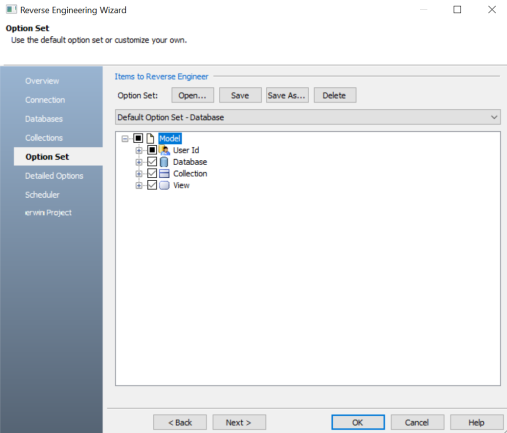
-
Click Next.
The Detailed Options tab appears. Set up appropriate options based on your requirement.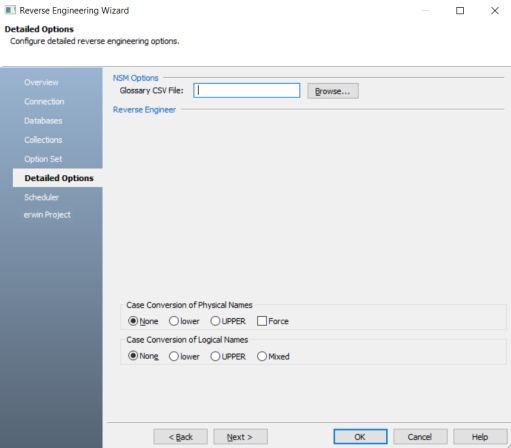
-
Click Next.
The Scheduler tab appears.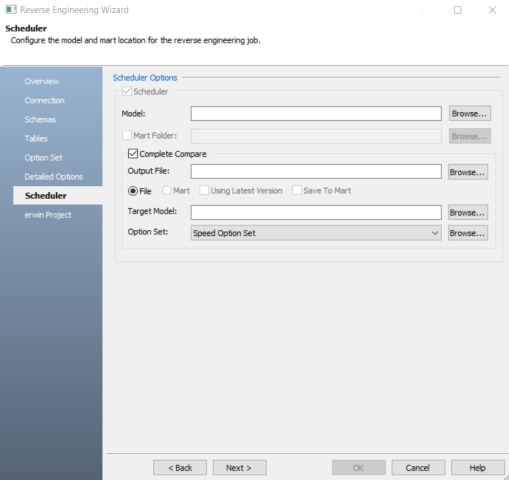
-
Configure appropriate scheduler options. Refer the following table:
-
Click OK.
The reverse engineering process starts.
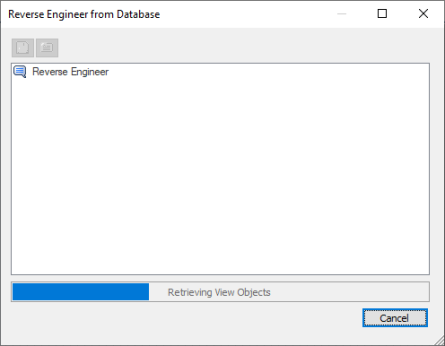
Once the process is complete, based on your selections, a schema is generated, and a model is created.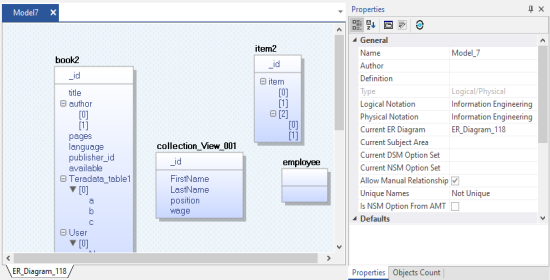
|
Parameter |
Description |
Additional Information |
|---|---|---|
| Model | Specifies the location and name of the reverse engineered model |
For example: C:\Scheduler\<Model Name>.erwin When you schedule a job on a remote server, ensure the model path is same for remote and local server. |
| Mart Folder | Specifies the location or library in your mart where the reverse engineered model is saved |
To use this option, ensure that you are connected to a mart. For more information, refer to the Connecting to Mart topic. |
| Complete Compare | Specifies whether the Complete Compare (CC) process should run while reverse engineering | |
| Output File | Specifies the location of the CC output file generated | |
| File | Specifies that the target model location is on the local system | |
| Mart | Specifies that the target model location is in the mart | |
| Using Latest Version | Specifies whether the target model is the latest version of the model in the mart | This option is available only when Mart is selected. |
| Save To Mart | Specifies whether the reverse engineered model is saved to the mart | This option is available only when Using Latest Version is selected. |
| Target Model | Specifies the location of the target model for CC | |
| Option Set | Specifies the option set that is used for CC |
Advanced Default Option Set: Indicates that all erwin DM metadata is included. CC works slowest with this option. Speed Option Set: Indicates that only the essential metadata is included. CC works the fastest with this option set. Standard Default Option Set: Indicates that standard metadata is included. CC works fast with this option set compared to the Advanced option set. In addition to the above options, click Browse to select a custom option set for complete compare. |
|
Compare Level |
Specifies the selection type for the compare |
Logical / Physical: Compares all objects on the logical or physical level of a model Logical: Compares all objects on the logical level of a model Physical: Compares all objects on the physical level of a model Database: Compares all objects on the database level of a model |
|
Copyright © 2025 Quest Software, Inc. |