OpenAPI Specification (OAS) Models
You can now create and manage OpenAPI specifications using a model-driven, diagram-based approach in erwin DM. This enables API developers to design OpenAPI specifications like data models with a familiar modeling environment. This ensures:
-
Consistency between data structures and API definitions
-
Reduced duplication by reusing existing data models
-
Improved collaboration and communication via visual API representation
You can create physical OpenAPI models using predefined OpenAPI components and then build on top of it. These models support reverse engineering and forward engineering via specifications in JSON and YAML formats.
Creating OAS Models
erwin DM supports OpenAPI modeling using predefined specification components that follow structure and terminology according to the OpenAPI Specification (OAS). These components, when used for modeling are designed to include metadata for APIs, requests, and responses. The OAS implementation in erwin DM supports JSON and YAML file formats for reverse engineering and forward engineering.
OAS implementation supports only Physical modeling.
Creating OAS Models
To create OAS models and objects, and define their properties, follow these steps:
-
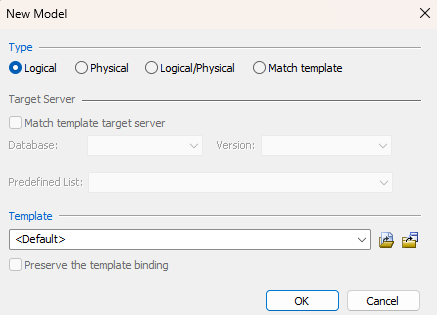
In erwin DM, click File > New.
The New Model screen appears.
-
Configure the following options:
-
Click Physical.
-
In the Database list, select OpenAPI.

-
Click OK.
A blank physical model is created.
-
On the ribbon, click Home > OpenAPI Objects and add it to the diagram.
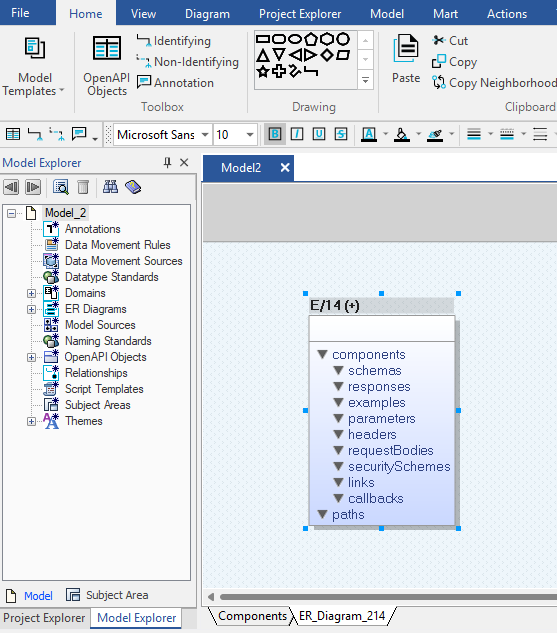
An object with empty predefined OAS object types is added to the model diagram. The + sign on the object indicates that you can expand it. To expand the object, you can double-click the object name or on the ribbon, click Actions > Hierarchical View.
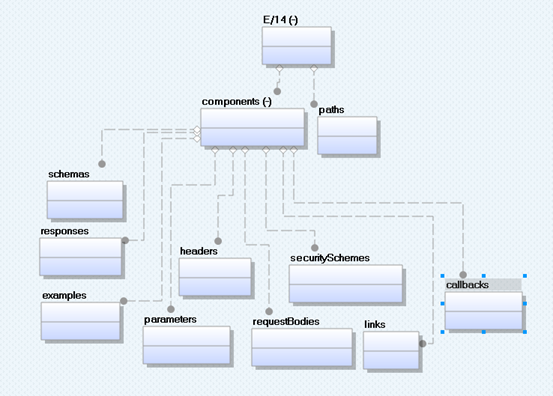
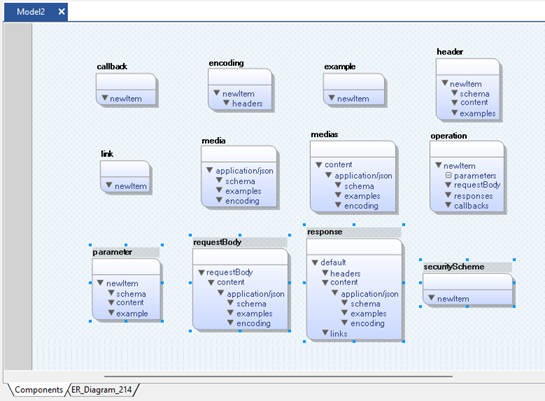
To view all available predefined OAS objects, click the Components tab. These components are reusable objects.
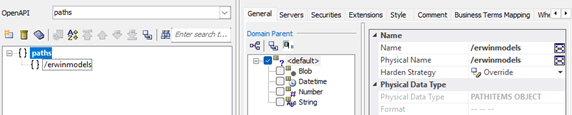
Use the path object available in the model diagram to specify the relative path to an individual API endpoint. Path names must start with a / (front-slash). For example, /erwinmodels as shown in the following image:
-
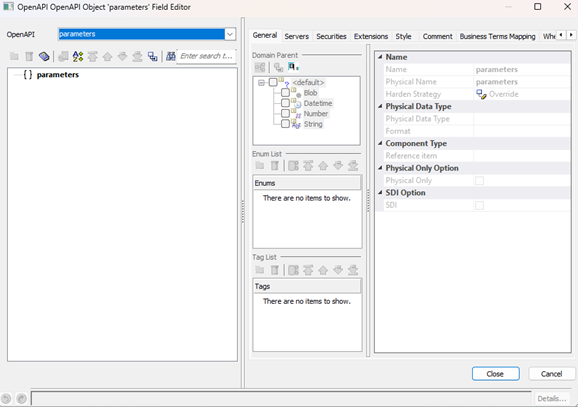
On the object type where you want to add objects, right-click and click Field Properties.
For example, right-click the parameters object type and click Field Properties. These properties form the API metadata.
-
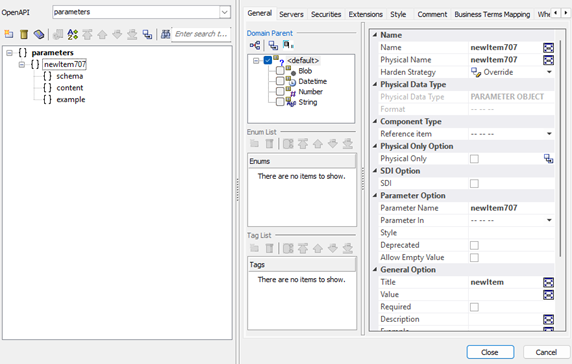
On the Field Editor, right-click the component name and click Add Component.
This adds the corresponding predefined component with all the necessary properties.
For example, right-click { } parameters and click Add Component.
-
Set up the required property values and click Close.
Similarly, set up all the required object properties to complete the OAS model.
-
For a better idea about OAS models, the following image shows a sample petstore model and properties.
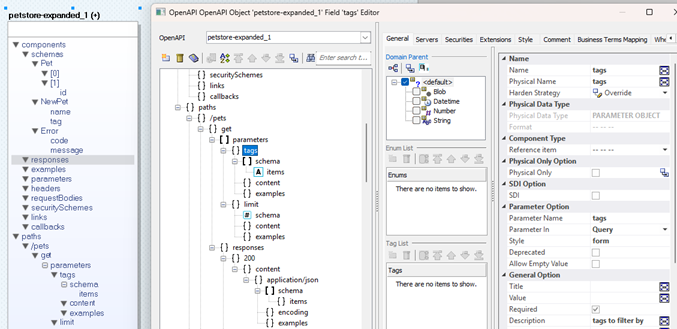
Refer to the OAS documentation for detailed information on OAS description structure.
Reverse Engineering OAS Models
Following sections explain the reverse engineering options for OpenAPI.
|
Parameter |
Description |
Additional Information |
|---|---|---|
| Script File | Specifies the reverse engineering source |
Script File: Indicates that the model is reverse engineered from a script |
|
File |
Specifies the path of the script file that should be used for reverse engineering |
Supported file formats are JSON and YAML. |
|
Parameter |
Description |
Additional Information |
|---|---|---|
| Glossary CSV File | Specifies the naming standard glossary file in the .CSV format | |
| Case Conversion of Physical Names | Specifies how the case conversion of physical names is handled |
Not applicable |
| Case Conversion of Logical Names | Specifies how the case conversion of logical names is handled |
Not applicable |
| Save Field Value | Specifies whether values of attributes or fields are saved to the model |
|
The options on this tab are available only while reverse engineering via erwin DM Scheduler.
|
Parameter |
Description |
Additional Information |
|---|---|---|
| Model | Specifies the location and name of the reverse engineered model |
For example: C:\Scheduler\<Model Name>.erwin When you schedule a job on a remote server, ensure the model path is same for remote and local server. |
| Mart Folder | Specifies the location or library in your mart where the reverse engineered model is saved |
To use this option, ensure that you are connected to mart. For more information, refer to the Connecting to Mart topic. |
| Complete Compare | Specifies whether the Complete Compare (CC) process should run while reverse engineering | |
| Output File | Specifies the location of the CC output file generated | |
| File | Specifies that the target model location is on the local system | |
| Mart | Specifies that the target model location is in the mart | |
| Using Latest Version | Specifies whether the target model is the latest version of the model in the mart | This option is available only when Mart is selected. |
| Save To Mart | Specifies whether the reverse engineered model is saved to the mart | This option is available only when Using Latest Version is selected. |
| Target Model | Specifies the location of the target model for CC | |
| Option Set | Specifies the option set that is used for CC |
Advanced Default Option Set: Indicates that all erwin DM metadata is included. CC works the slowest with this option. Speed Option Set: Indicates that only the essential metadata is included. CC works the fastest with this option set. Standard Default Option Set: Indicates that standard metadata is included. CC works fast with this option set compared to the Advanced option set. In addition to the above options, click Browse to select a custom option set for complete compare. |
|
Compare Level |
Specifies the selection type for the compare |
Logical / Physical: Compares all objects on the logical or physical level of a model Logical: Compares all objects on the logical level of a model Physical: Compares all objects on the physical level of a model Database: Compares all objects on the database level of a model |
|
Parameter |
Description |
Additional Information |
|---|---|---|
| erwin Project | Specifies whether to configure the model for an existing erwin project | |
| Model Name | Specifies the name of the erwin project | |
| Location | Specifies the location of the project |
Forward Engineering OAS Models
Following sections explain the forward engineering options for OpenAPI.
|
Parameter |
Description |
Additional Information |
|---|---|---|
| Option Set | Specifies the option set template for forward engineering |
Open: Use this option to open a saved XML option set file. Save: Use this option to save a configured option set. Save As: Use this option to save an option set in the XML format. Delete: Use this option to delete an option set. |
| Database Template | Specifies the database template for controlling schema generation | |
| Script Option | Specifies the script option for the schema generation | Pre-Script: Indicates whether pre-scripts attached to the schema are executed Post-Script: Indicates whether the post-scripts attached to the schema are executed |
| General Syntax Option | Specifies the general options for schema generation |
Data: Indicates whether to include model data in the schema Schema: Indicates whether to include model design details in the schema Comments: Indicates whether comments are included in the schema |
| Collection Syntax Option | Specifies the collection options for schema generation | Blank Value: Indicates whether to include a blank value instead of other characters in the schema |
|
Parameter |
Description |
Additional Information |
|---|---|---|
| Object | Specifies the selected OpenAPI object |
|
|
Parameter |
Description |
Additional Information |
|---|---|---|
| Viewer | Displays the OpenAPI schema in the viewer editor |
Collapse All: Use this option to collapse all the nodes. Search: Use this option to search a text entered in the search box. Find Previous: Use this option to navigate to previous search string in the search results Find Next: Use this option to navigate to next search string in the search result. |
| Text | Displays the OpenAPI schema in the text editor |
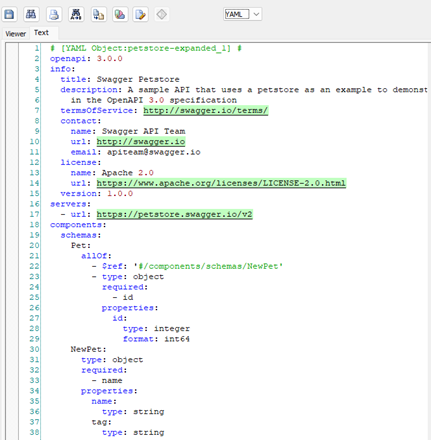
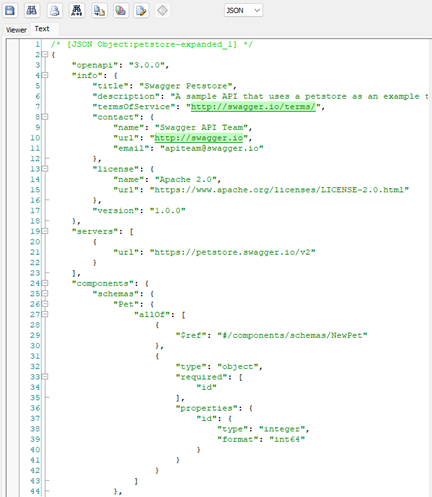
Select the file format in which you want to generate the OpenAPI Specification. Supported formats are JSON and YAML. Save: Use this option to save the generated schema. Search: Use this option to search through the generated schema. Print: Use this option to print the generated schema. Replace: Use this option to find and replace text in the generated schema. Copy: Use this option to copy the selected text in the schema. Text Options: Use this option to edit window settings, fonts, and syntax color. Error Check:Use this option to run an error check. Based on the results, you can correct the generated script. |
The following images show the forward engineering script for an OAS model in YAML and JSON formats respectively.
|
Copyright © 2025 Quest Software, Inc. |