SAML with Entra ID
Based on your application type, refer to the appropriate section for SAML configuration:
-
Once SAML configuration is ready, you can add user groups to erwin Mart Portal.
Before you configure Entra ID SAML, ensure that you have responded to the questionnaire from your Quest Support representative so that they can provide you with the Identifier and Reply URL for your erwin Mart Portal instance. If you did not receive the questionnaire, reach out to your Quest Support representative.
To configure Entra ID SAML for erwin Mart Portal on-cloud authentication, follow these steps:
-
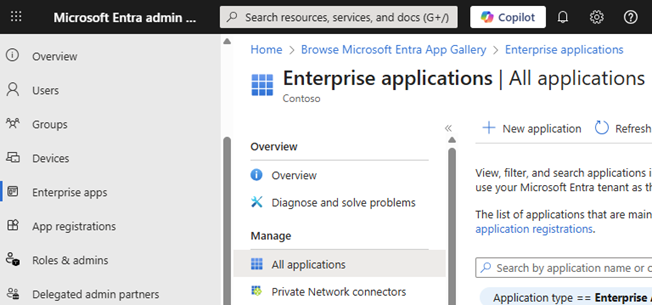
Log in to the Microsoft Entra admin center.
-
Click Enterprise apps.
-
Click New application and create your non-gallery application with an appropriate name.
-
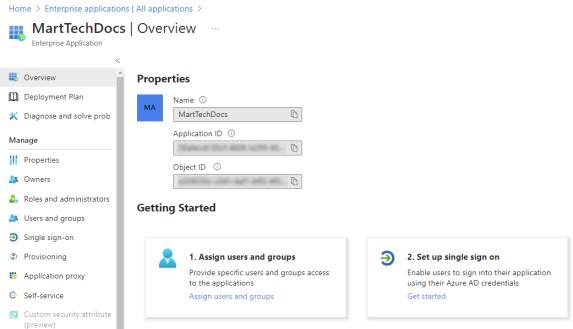
Open your newly created application.
-
Click Set up single sign on.
-
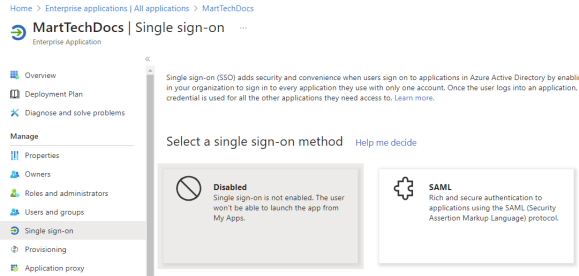
Under single sign-on method, click SAML.
-
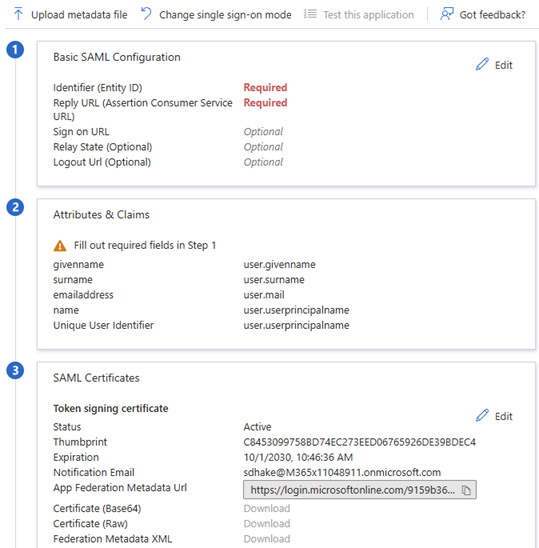
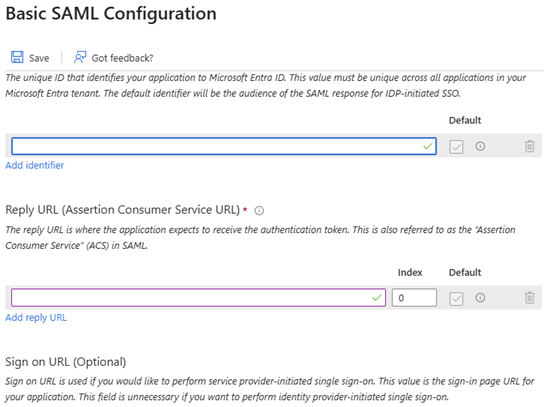
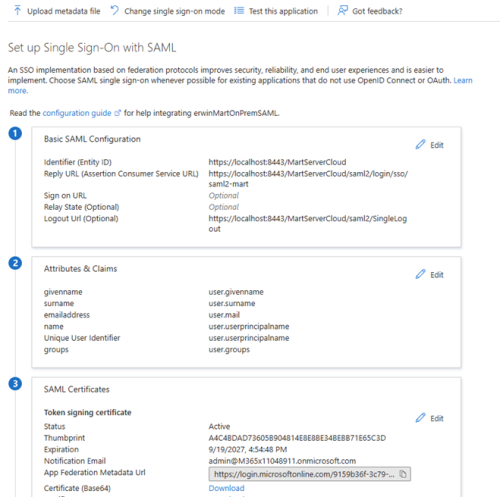
In the Basic SAML Configuration section, click Edit.
The Basic SAML Configuration page opens.
-
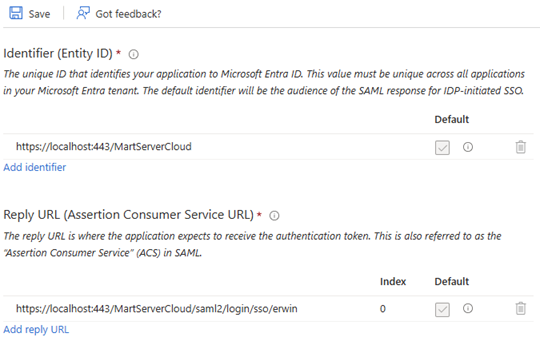
Enter the Identifier and Reply URL that you received from Quest Support in the respective fields and click Save.
For example, your Identity and Reply URL would follow the https://<Customer>.myerwin.com/MartServerCloud format.
For the Reply URL, enter your https://<Customer>.myerwin.com/MartServerCloud URL. Once your erwin Mart Portal instance is configured, you will need to change it to the correct URL shared by Quest Support.
-
In the Attributes & Claims section, click Edit.
The Attributes & Claims page opens.
-
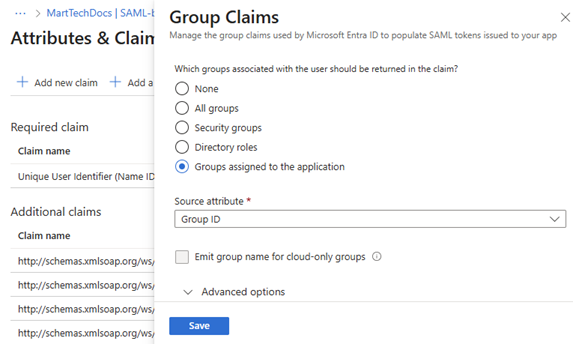
Click Add a group claim. In the Group Claims pane, click Groups assigned to the application and in the Source attribute list, select Group ID.
-
Click Save.
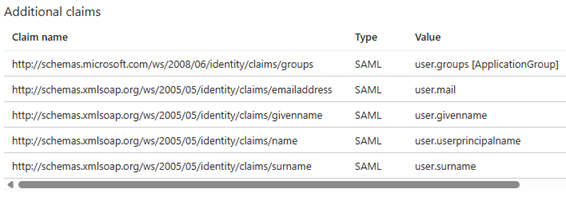
This configures the group attribute name (user.groups [ApplicationGroup]). This is a necessary property.
Apart from this, you can configure email (user.mail) and display name (user.givenname) values here. However, they are optional.
-
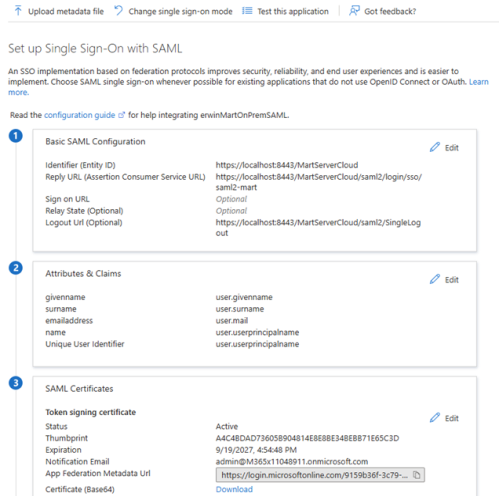
Go back to the Set up Single Sign-On with SAML page.
Under Attributes & Claims, the user.groups claim is available now.
-
Copy the App Federation Metadata URL and save it for use later, in step 16.
-
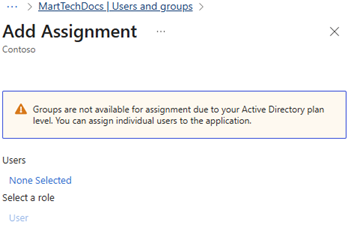
Click Users and groups > Add user/group. Initially, under Users, it displays None Selected.
-
Click the None Selected link.
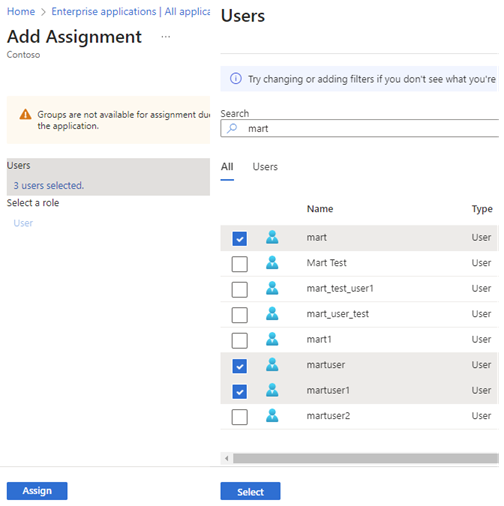
Select the required users or groups and click Select. Then, click Assign.
Your SAML SSO setup for the required users is complete.
-
Finally, share the following information with your Quest Support representative along with the detailed questionnaire that you receive at the beginning of the engagement:
-
App Federation Metadata URL (copied in step 14)
-
Group Attribute Name (Available under Attributes & Claims. For example, user.groups http://schemas.microsoft.com/ws/2008/06/identity/claims/groups)
Group Attribute Name is case-sensitive.
-
Optional-User Email Attribute Name (Available under Attributes & Claims, For example, user.mail http://schemas.xmlsoap.org/ws/2005/05/identity/claims/emailaddress)
-
Optional-User Display Name Attribute Name (Available under Attributes & Claims, For example, user.givename http://schemas.xmlsoap.org/ws/2005/05/identity/claims/givenname)
Once the support team authenticates erwin Mart Portal for you, you can move to adding groups in erwin Mart Portal at https://<your_instance>.myerwin.com/MartPortal.
-
To configure Entra ID SAML for erwin Mart Portal authentication, follow these steps:
-
Log in to the Microsoft Entra admin center.
-
Click Enterprise apps.
-
Click New application and create your non-gallery application with an appropriate name.
-
Open your newly created application.
-
Click Set up single sign on.
-
Under single sign-on method, click SAML.
-
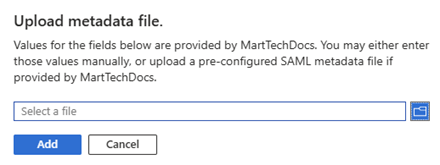
Click Upload metadata file.
-
Select the SP Metadata file (mart-sp-metadata.xml) that you downloaded (erwin Mart Portal Configuration > Authentication tab > Download SP Metadata) during erwin Mart Portal configuration.
Then, click Add.
Doing this retrieves the Identifier, Reply URL, and Logout URL.
-
Click Save.
The necessary metadata is saved under the Basic SAML Configuration section.
-
In the Attributes & Claims section, click Edit.
The Attributes & Claims page opens.
-
Click Add a group claim. In the Group Claims pane, click Groups assigned to the application and in the Source attribute list, select Group ID.
-
Click Save.
This configures the group attribute name (user.groups [ApplicationGroup]). This is a necessary property.
Apart from this, you can configure email (user.mail) and display name (user.givenname) values here. However, they are optional.
-
Go back to the Set up Single Sign-On with SAML page.
Under Attributes & Claims, the user.groups claim is available now.
-
Copy the App Federation Metadata URL.
-
Click Users and groups > Add user/group. Initially, under Users, it displays None Selected.
-
Click the None Selected link.
Select the required users or groups and click Select. Then, click Assign.
Your SAML SSO setup for the required users is complete.
-
On the erwin Mart Portal Configuration screen, click the Authentication tab, and then follow these steps:
-
In the MetaData XML field, paste the App Federation Metadata URL copied in step 14.
-
In the Group Attribute Name, User Email Attribute Name, and User Display Name Attribute Name fields, configure values as follows:
-
Group Attribute Name (Available under Attributes & Claims. For example, user.groups http://schemas.microsoft.com/ws/2008/06/identity/claims/groups)
-
Optional-User Email Attribute Name (Available under Attributes & Claims, For example, user.mail http://schemas.xmlsoap.org/ws/2005/05/identity/claims/emailaddress)
-
Optional-User Display Name Attribute Name (Available under Attributes & Claims, For example, user.givename http://schemas.xmlsoap.org/ws/2005/05/identity/claims/givenname)

-
-
-
Click Configure.
Your erwin Mart Portal is now authenticated via SAML EntraID.
Adding Groups in erwin Mart Portal
To add your Entra ID SAML groups to erwin Mart Portal, follow these steps:
-
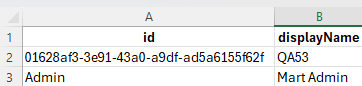
Create a CSV file containing the <group_attribute_value> and <group_display_name>.
You can also use the sample template for groups and replace the sample values with the actual Group Attribute Name and Group Display Name.

-
Log in to the erwin Mart Portal as an administrator.
-
Go to Application Menu > Users.
The Users page appears.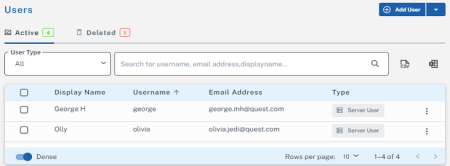
-
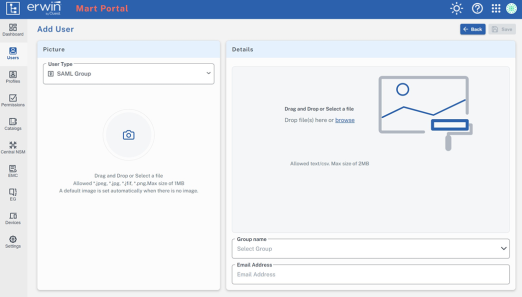
Click Add User.
The Add User page appears.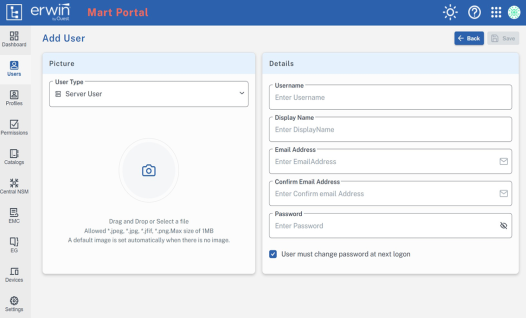
-
Under User Type, select SAML Group
-
Drag and drop the CSV file that you created in step 1.
-
Under Group name, select the required group.
-
In the Email Address field, enter your email address.
-
Click Save.
The group has been added.