To create projects, follow these steps:
- In the Project Explorer, click New Project
.
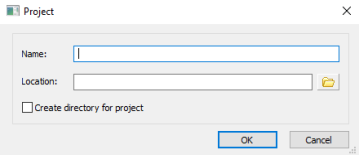
The Project window appears. - Enter a name for the project.
- Browse and specify a location for the project.
- To create a folder for the project at the specified location, select Create directory for project.
- Click OK.

The new project opens in the project explorer pane.
Once you have created a project, you can add new folders and models or import existing models into the project.
Creating Folders
You can organize your projects better with folders and subfolders.
To create folders in projects, follow these steps:
- Right-click the project and click New Folder.
- Enter a name for the folder, and press Enter.
To add subfolders, right-click a folder and click Add > New Folder.
You can add only two levels of folders in a project.
Importing Models
You can import models from local storage or mart as source and target models.
Importing Models from Local Storage
To import models from your local folder, follow these steps:
- Right-click a folder or source model to which the model must be added and click Add > Open model.
- Select the required model and click Open.
The file explorer window appears.
The model is added to the selected folder and opens in the Diagram window.
Importing Models from Mart
To import models from mart, follow these steps:
- Right-click a folder or source model to which the model must be added and click Add > Open Model from Mart.
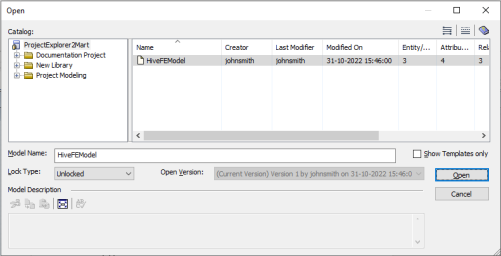
- Select the required model file and click Open.
The Mart catalogs window appears.

Note: To import models from Mart, you must be connected to Mart Portal.
The model is added to the selected folder and opens in the Diagram window.
Creating Models in Projects
To create models in projects, follow these steps:
- Right-click the project or a folder and click Add > New Model.
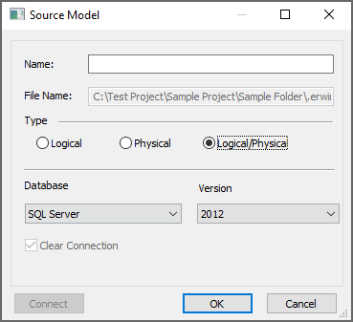
- Enter appropriate values in the fields. Refer to the following table for field descriptions.
- Click OK.
The Source Model window appears.

| Field | Description |
|---|---|
| Name | Specifies a name for the model |
| File Name | Specifies a name for the model file. This field is auto-populated. |
| Type | Specifies the type of the model. |
| Database | Specifies the database for the model |
| Version | Specifies the database version |
The model is added to the selected folder and opens in the Diagram window.
|
Copyright © 2025 Quest Software, Inc. |