Using the Auto Sync feature in Project Explorer, you can directly sync the changes introduced to a source model with any of its target models that have Auto Sync enabled. Auto Sync eliminates the need to separately open each target model and manually implement the changes repetitively. Instead, it provides an option to instantly compare the changes in the source model and its required targets, resolve differences, and replicate the changes to them.
To use Auto Sync, you must enable it during the creation of the target model:
While creating a new target model, in the Target Model window, select Auto Sync.
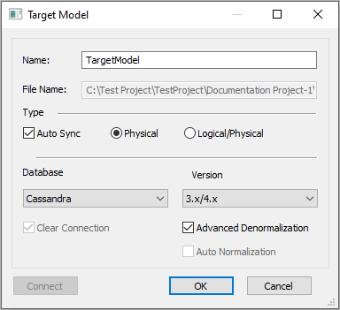
If you have enabled Auto Sync for a target model, you can use the Sync option any time to compare the target model with its source model, and move the changes in the source model to the target model.
To use the Sync option for a target model, follow these steps:
- Right-click the required target model, and select Sync.
- Click Next.
- Select appropriate values in the fields. Refer to the following table for field descriptions.
- Click Next.
- Select appropriate values in the fields. Refer to the following table for field descriptions.
- Click Next.
- Select appropriate values in the fields. Refer to the following table for field descriptions.
- Click Next.
- Select appropriate values in the fields. Refer to the following table for field descriptions.
- Click Sync.
- On the Object View section, move all applicable changes from the source model to the target model using the
 button.
 - Click Finish.
The Sync with Model Source window appears.
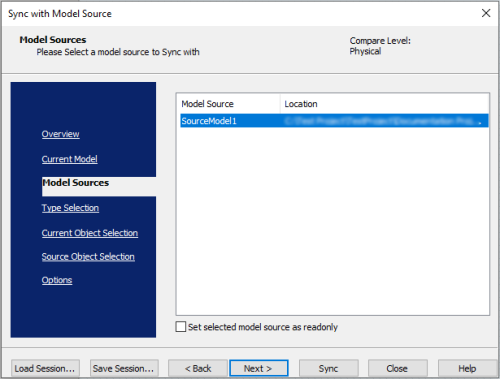
The Type Selection tab opens.
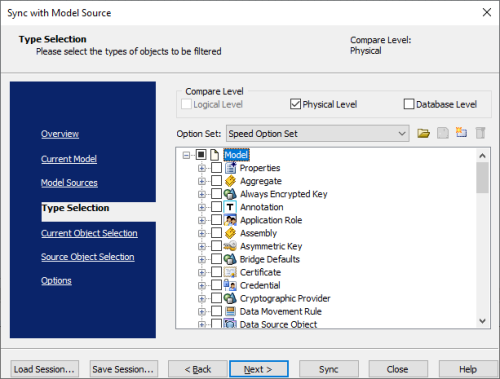
| Field | Description |
Additional Information |
|---|---|---|
| Compare Level | Specifies the selection type for the compare and sync |
Logical Level: Indicates that all objects that are contained on the logical level of a model are compared Physical Level: Indicates that all objects that are contained on the physical level of a model are compared Database Level: Indicates that all objects that are contained on the database level of a model are synced |
| Option Set | Specifies the option set for compare and sync |
Advanced Default Option Set: Indicates that all objects in the selection tree are included, except those objects that are assigned generated values during forward or reverse engineering Speed Option Set: Indicates that the frequently used and required objects are included Standard Default Option Set: Indicates that a default, minimal set of objects and properties are included |
The Current Object Selection tab opens.
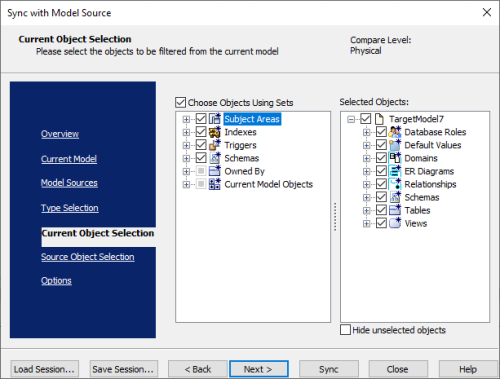
| Field | Description |
|---|---|
| Choose Objects Using Sets | Specifies whether a preset or a custom set of selected options are used |
| Selected Objects | Specifies the selected model objects for the target model |
| Hide Unselected Objects | Specifies whether unselected objects are removed from the list |
The Source Object Selection tab opens.
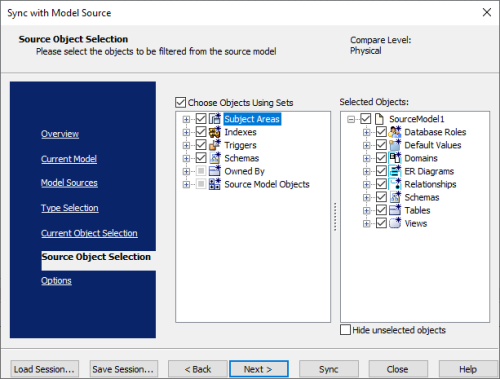
| Field | Description |
|---|---|
| Choose Objects Using Sets | Specifies whether a preset or a custom set of selected options are used |
| Selected Objects | Specifies the selected model objects for the source model |
| Hide Unselected Objects | Specifies whether unselected objects are removed from the list |
The Options tab opens.
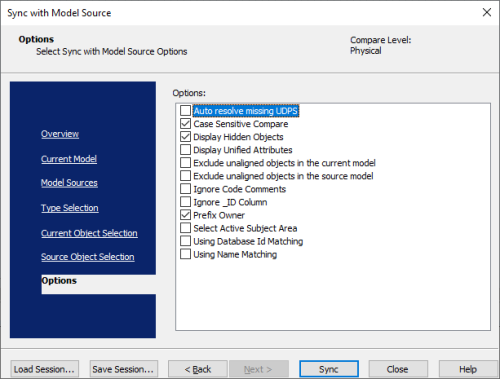
| Field | Description |
|---|---|
| Auto resolve missing UDPS | Specifies whether to skip the Type Resolution dialog when all the differences are due to missing UDPs |
| Case Sensitive Compare | Specifies whether a case-sensitive compare is performed |
| Display Hidden Objects | Specifies whether hidden objects must be displayed in the Resolve Differences window |
| Display Unified Attributes | Specifies whether a Unified Attributes group object is used to display all unified attributes (role-named or not) of the same unified set of attributes |
|
Exclude Unaligned Objects in the Current Model |
Specifies whether to exclude unaligned model-level objects from the target model in the Resolve Differences window |
|
Exclude Unaligned Objects in the Source Model |
Specifies whether to exclude unaligned model-level objects from the source model in the Resolve Differences window |
|
Ignore Code Comments |
Specifies whether to exclude blocks of comments from the body of an object, before including it in the compare process |
|
Ignore _ID Column |
Specifies whether to ignore the _id column during the compare process |
|
Prefix Owner |
Specifies whether objects are aligned based on both the name and owner name property |
|
Select Active Subject Area |
Specifies whether to select the active subject area by default in the Object Selection pane |
|
Using Database Id Matching |
Specifies whether objects are aligned based on their ID |
|
Using Name Matching |
Specifies whether objects are aligned based on their name |
The Resolve Differences window appears.
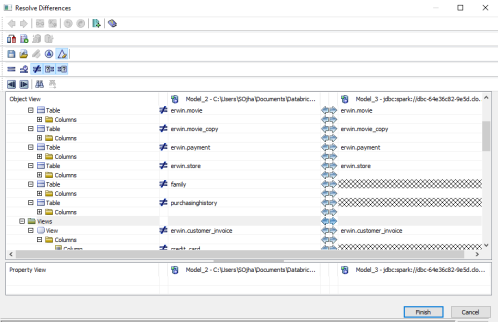
The changes are now added to the target model.
|
Copyright © 2025 Quest Software, Inc. |