You can harvest a single model, a library, or the complete catalog to erwin ER360. To schedule harvesting jobs, you must be an administrator with data harvesting permissions.
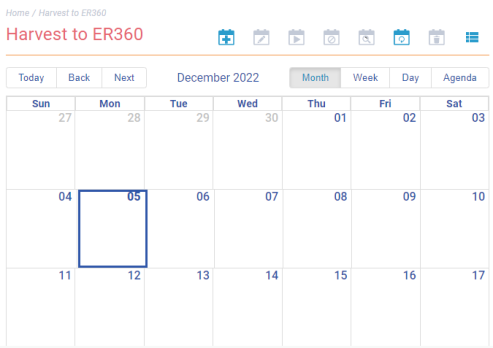
By default the Harvest to ER360 page in the Calendar view. You can toggle the page view between the List View (![]() ) or Calendar View (
) or Calendar View (![]() ) using the respective buttons on the page toolbar.
) using the respective buttons on the page toolbar.
To schedule a job, follow these steps:
-
In the header pane, click
 . Then, click Harvest to ER360.
This option is available only if you have a license for erwin ER360 and have initialized it.
The Harvest to ER360 page appears.
- Click
 .
.
- Set up job parameters as follows:
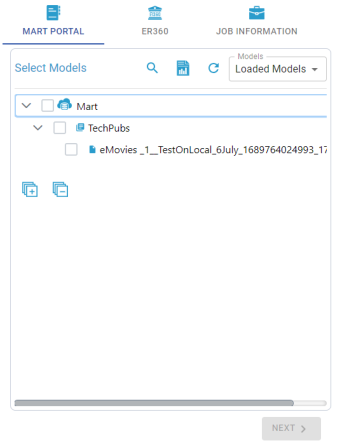
On the Mart Portal tab:- Select Models
- Select models from mart catalog to export.
To view selected models, click .
. - Models
- Select whether all available models are displayed in the list or only the ones that are loaded.
On the ER360 tab:- Select Libraries
- Select library in erwin ER360 to which you want to harvest models.
- Match Mart Path
- Specify whether the path structure of the model after harvesting must match the path structure in mart catalog.
- Import Options
- Select a suitable export option:
- Add & Update:
- If a model exists, this option adds any new data to it.
- If a model does not exist, this option adds the model.
- Delete & Reload:
This option deletes all data. Then, it harvests it again.
- Job Name
- Specify a job name.
- Scheduled Job On
- Select the date and time at which the job must run.
- Job Interval
- Select a suitable frequency at which the job must run. You can set the job to run once or recur daily, weekly, monthly, or yearly.
- Notify Me
- Select whether a notification is sent to you when the job status changes.
This enables the Notification Email and CC List fields.- Notification Email
- Specify the email address at which you want to receive the notification.
- CC List
- Specify a semi-colon-separated list of email addresses that must receive the job notification
- Run Now
- Select the checkbox to run the job immediately.
-
Click Submit.
The job is added to the calendar for execution with its Job State set to Scheduled. Once the job is successful, your data is harvested to erwin ER360.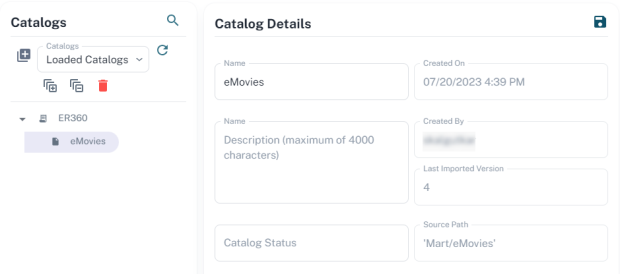
Once a job is set up, you can use the following options on it:
- Run Job: Use this option to run a scheduled recurring job immediately.
- Manage Job: Use this option to modify an existing scheduled job. If you modify a job:
before its run schedule, the changes take effect when the job runs
while it is running, the job is canceled, and changes are saved. They take effect when the job runs next time.
after it is past its schedule, the job runs according to the new schedule.
- Refresh Job: Use this option to refresh the job state.
- Cancel Job: Use this option to cancel a scheduled or running job.
- Delete Job: Use this option to delete a job from the job list.
- View Log: Use this option to view a job's log. In case of failures, you can use the log to troubleshoot.
Job status is indicated by the following colors:
|
Color |
Job Status |
|---|---|
|
|
Scheduled |
| Successful | |
| Running | |
| Failed |
|
Copyright © 2025 Quest Software, Inc. |