Once you have installed erwin DM Scheduler, to use it, follow these steps:
- Start erwin Data Modeler (DM).
- On the ribbon, click Tools.
- Click erwin DM Scheduler.
Then, if you are an administrator user, click Start Service. If you are a non-administrator user, the service starts automatically.
This opens the Scheduler in a new window.In a Microsoft Windows 7 environment, starting or stopping the erwin DM Scheduler Service through erwin DM Scheduler may display a warning. In that case, use Windows Services to start or stop the service.
erwin DM Scheduler has a tri-pane layout that consists of the ribbon, navigation pane, and calendar view.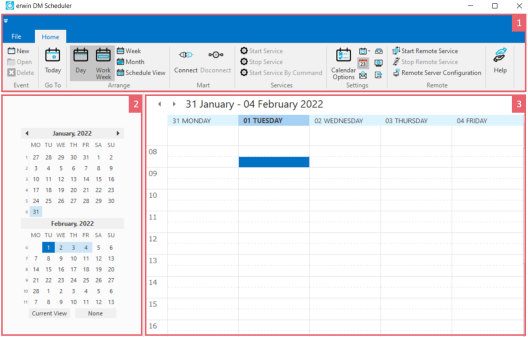
Pane
Function
1-Ribbon The Home tab of the ribbon contains all the actions that you can perform in the Scheduler.
It enables you to do the following:- Create or work on jobs
- Manage erwin Mart connection
- Manage erwin DM Scheduler Service
- Manage erwin DM Scheduler settings
- Set up remote servers
- Customize the calendar view pane
- Access help
2-Navigation
(Date Picker)The navigation pane (date picker) enables you to navigate today, work week, week, or month depending on your calendar view. 3-Calendar view The calendar view displays the detailed view and the jobs scheduled during the day, work week, week, or month depending on your calendar view.
|
Copyright © 2025 Quest Software, Inc. |