The Forward Engineer Alter Schema Generation Wizard generates an alter script for a database after you make changes to a model. For a Mart Model, you can push the alter script to a Git repository.
To commit alter scripts to Git repositories, follow these steps:
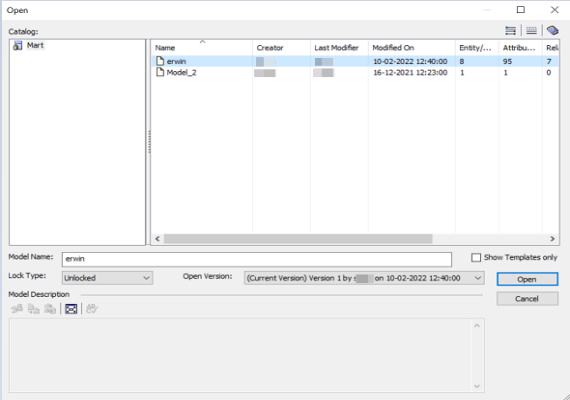
- On the ribbon, go to Mart > Open
- Select a model, and then click Open.
- Make the required changes in the model.
- Go to Actions > Alter Script.
- On the Forward Engineer Alter Schema Generation Wizard, click the Preview section.
- Click
 .
. - Enter appropriate values in the fields. Fields marked with an asterisk (
 ) are mandatory. Refer to the following table for field descriptions.
 - Click Commit.
The Open page appears.
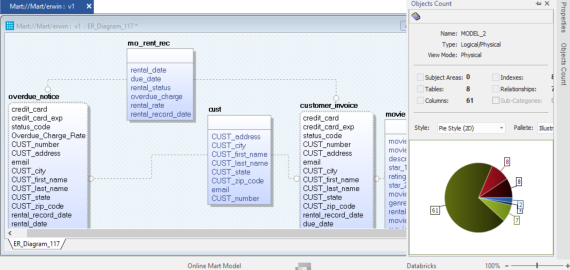
The Mart Model opens.
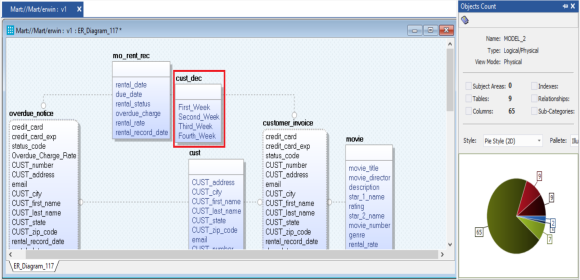
For example, in the following model, a new table, cust_dec with four columns is added.
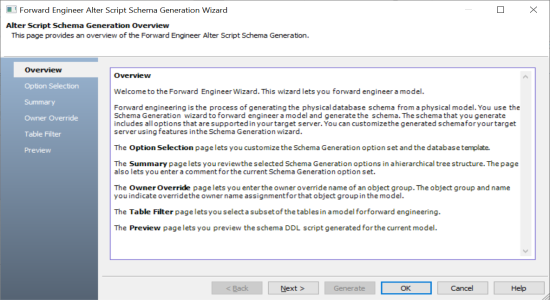
The Forward Engineer Alter Script Schema Generation Wizard appears.
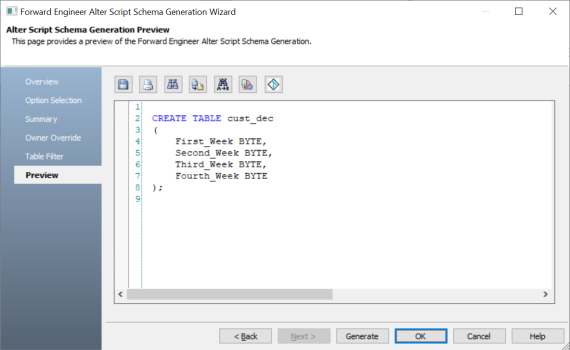
The alter script appears. For more information on generating alter scripts, refer to the Generating Alter Script for Databases topic.
For example, in the following image the Preview section displays an alter script of a Databricks database.
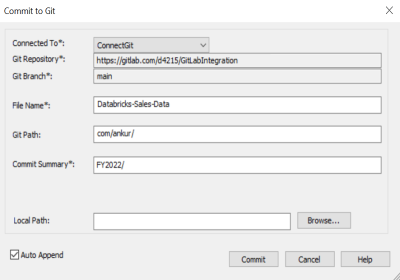
The Commit to Git screen appears. The File Name and Git Path values autopopulates with the values configured in the previous commit. You can update the File Name and Git Path as per the requirement.
| Field Name | Description | Additional Information |
|---|---|---|
| Connected To | Specifies the connection that connects erwin DM to a Git repository | For example, ConnectGit. |
| Git Repository | Specifies the Git repository configured for Connection |
For example, https://gitlab.com/d4215/GitLabIntegration is set for the ConnectGit connection. This field autopopulates based on the repository configured in the Git Connection Manager. |
| Git Branch | Specifies the Git branch that was set for connection in the Git Connection Manager |
For example, main is set for the ConnectGit connection. This field autopopulates based on the repository configured in the Git Connection Manager. |
| File Name | Specifies the user-defined name of the FE script file being committed to a Git repository | For example, Databricks-Sales-Data.sql |
| Git Path | Specifies the location in the Git repository where the FE script is committed |
For example, FY2022/ The FE script is committed to the FY2022 folder inside the root folder of your Git repository. |
| Commit Summary | Specifies the summary of the push commit | For example, Append December Sales. |
| Local Path | Specifies the location on your local machine where the Alter script is saved | C:\Users\SO\Documents\Databricks |
| Auto Append | Specifies whether the alter script is appended to the file set in File Name and Git Path |
By default, the Auto Append check box is selected. To create a new script file, clear the Auto Append check box and set the File Name and File Path belonging to an existing file. A new file with the following naming convention: <File Name>_YYYY-MM-DD_HH-MM-SS is created. Ensure that you use this check box consistently every time you commit an alter script. |
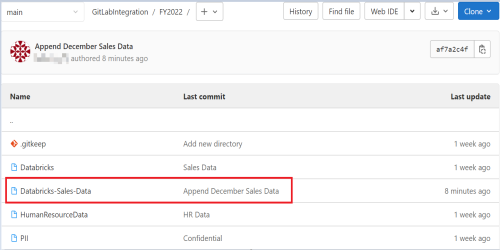
The alter script file is saved on the local path and committed to the Git repository.
For example, in the following image, an alter script file is committed to a GitLab repository and appended to an existing file, Databricks-Sales-Data, with a commit summary, Append December Sales using the main branch.
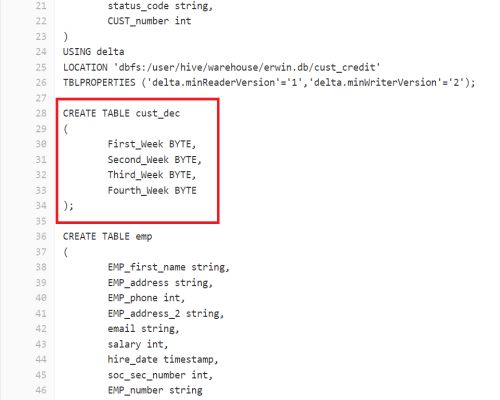
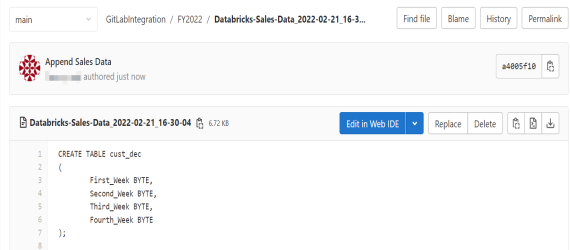
You can click the file to review its content. For example, in the following image, Databricks-Sales-Data contains the alter script.
Clearing the Auto Append check box and setting the File Name and File Path belonging to an existing file creates a new file with the following naming convention: <File Name>_YYYY-MM-DD_HH-MM-SS.
For example, in the following image, a file is created with a time stamp in a Git repository.
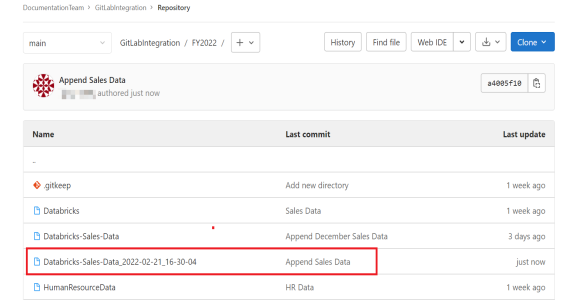
This file contains only the alter script.
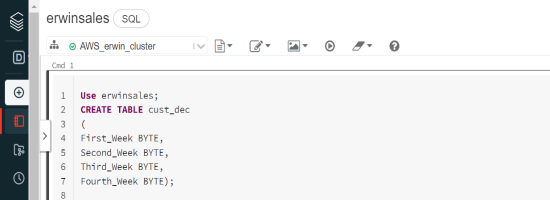
Use the committed FE script to generate a physical schema in your database. To generate schema, copy the FE script from your Git repository and run the script in the database.
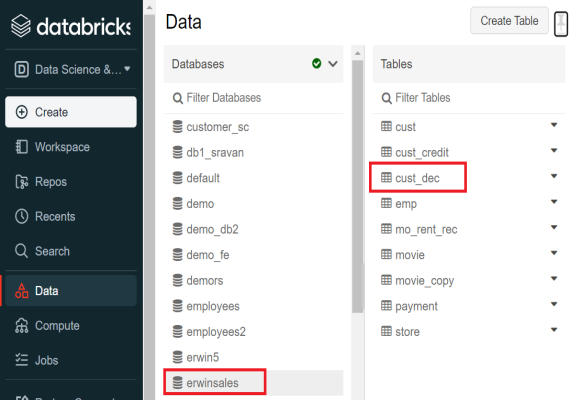
For example, in the following Databricks database, the FE script copied from the Git repository is run.
The cust_dec table is created in a Databricks database.
|
Copyright © 2023 Quest Software, Inc. |