Creating data product models
Updated  Sunday, May 03, 2026
To understand how to create data product models effectively, let’s look at a scenario.
Scenario: A retail company is implementing a new inventory management system
A retail organization is rolling out a new inventory management system and must align its logical data model with the existing physical databases. This scenario demonstrates how data product modeling helps teams translate business concepts into implementable structures while ensuring consistency, accuracy, and seamless integration across systems.
Business needs
-
Maintain data consistency
-
Enable seamless system integration
-
Support accurate inventory tracking
The workflow for creating a logical model involves the following steps:
Creating a model
The following steps walk you through creating a new data product model for this scenario.
To create a model:
-
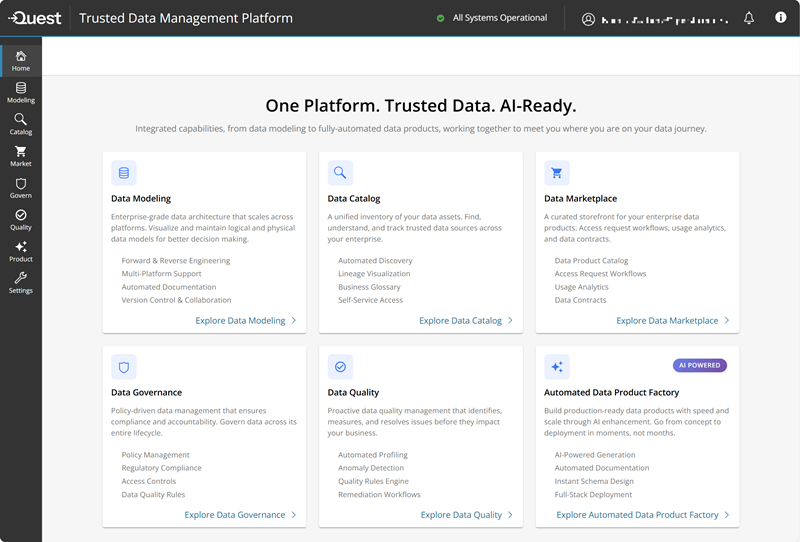
Sign in to the Quest Trusted Data Management Platform, then switch to your organization or create a new one.
The Home page appears.

NOTE: For more information about organizations, refer to Managing organizations and regions section.
-
On the Home page, do one of the following:
-
In the left navigation pane, click Product, and then click New Data Product.
-
On the Home page, on the Automated Data Product Factory card, click Get started.
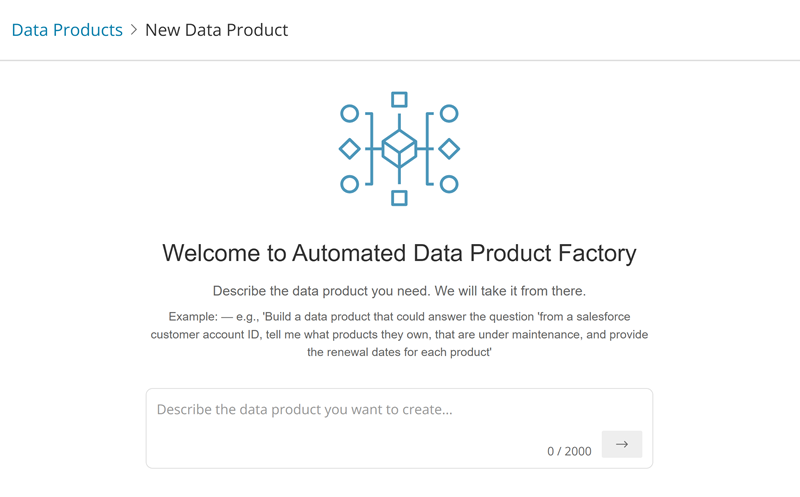
The chat box page appears.
-
-
Describe the data product you want to create. For example,
Create a model for implementing a new inventory management system. The solution must maintain data consistency, enable seamless system integration, and support accurate inventory tracking.
The next screen:
-
Loads the canvas on the left side of the screen
-
Opens the chat panel on the right and begins displaying live processing updates
-
Automatically generates entities and relationships based on your input
-
Displays the completed logical model, which includes entities such as Product, Location, Inventory Balance, and Supplier
For more information on prompts, refer to the Best Practices for Writing Effective Prompts topic.
After the process completes, the chat panel displays a summary of what was created and suggests prompts for further actions.
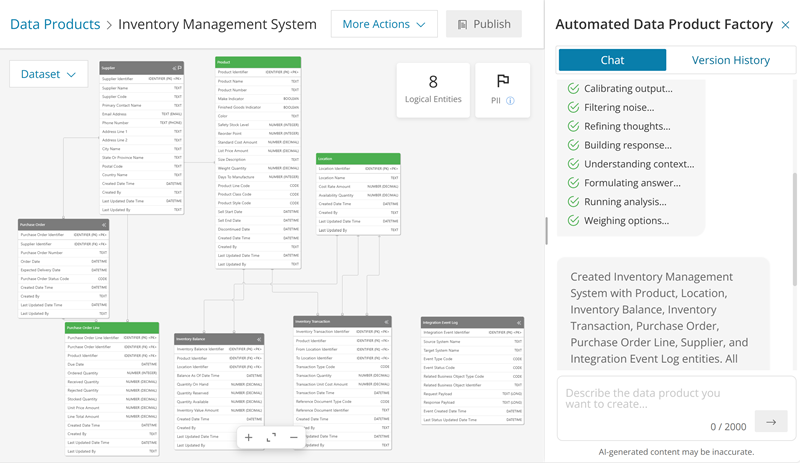
NOTE: Green indicates that semantic matches have been found in existing data products. Blue shows matches in physical models, and gray identifies AI‑generated entities.
-
-
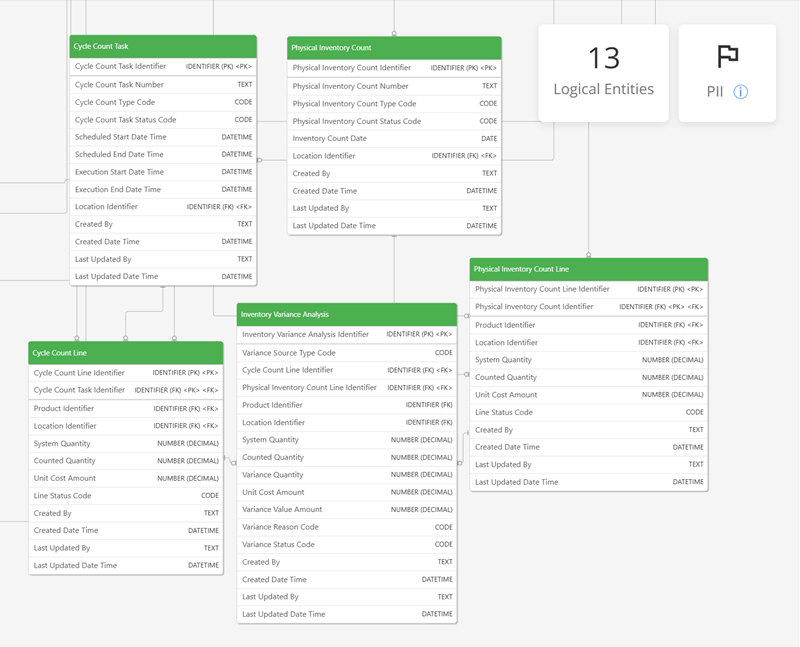
Enter your own prompt or choose a suggested prompt. For example,
Add Cycle Count and Physical Inventory entities.
The Cycle Count Task, Cycle Count Line, Physical Inventory Count, Physical Inventory Count Line, and Inventory Variance Analysis entities are added. And all relationships are created linking them to Product, Location, and each other.
It also explains in the chat panel what has been created.
-
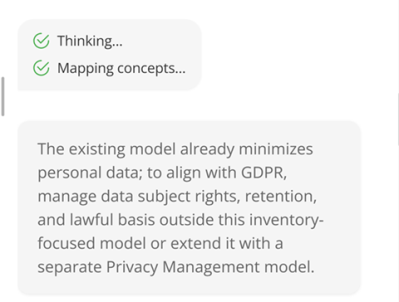
Enter your prompts for compliance. For example,
Ensure that the model and all its components align with GDPR standards. Add any additional elements or constraints required to fully meet GDPR guidelines.
It thinks, maps, conceptualizes, and provides suggestions.
You can continue with the updates according to your requirements. You can also save different versions of your model. This will help you return to a previous version if you decide to go back later.
Saving a version
To save a version of your model:
-
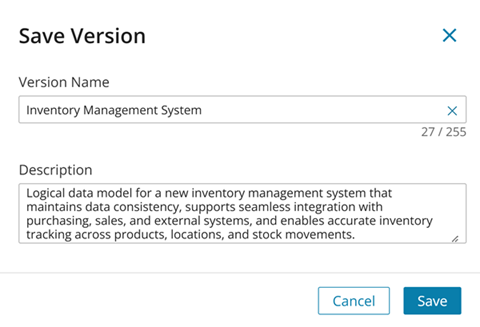
Expand More Actions, and then click Save Version.
The Save Version dialog appears.
- Verify or update details, and then click Save.
You can save multiple versions of your model and view the version history in the chat panel or when reviewing and updating the data model. You can select any saved version to load it again.
For more information on reviewing and updating, refer to the Reviewing and Updating Data Products topic.
Matching entities
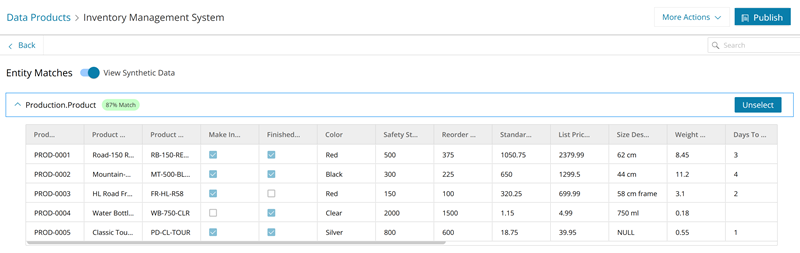
You can use the Entity Matches option to analyze your data catalog and identify the tables that best correspond to each entity in your data product model.
To view entity matches:
-
Expand DataSet, and then click Entity Matches.
Entity matches are displayed with their corresponding percentage match scores, and the match with the highest score is selected by default.
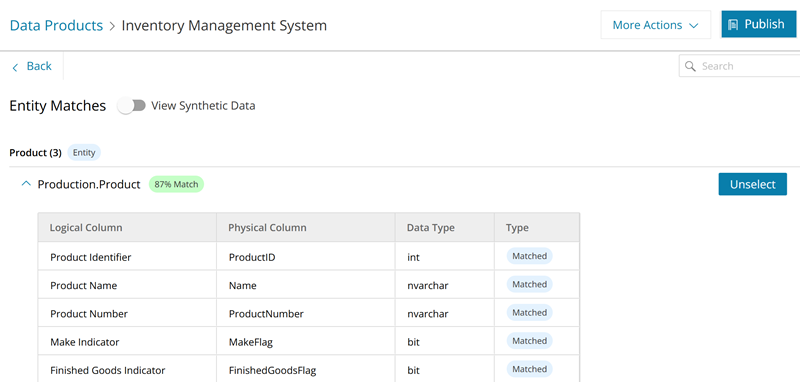
You can expand each match to view the details. It displays the matched Physical Column with its Data type and Type. Type shows whether it is a match or AI-generated.
-
To select a match of your choice, click Unselect for the already selected match, and then click Select next to the desired table.
|
|
NOTE: Once the Entity Matches are displayed for all entities, the Publish button becomes active. |
In addition to analyzing entity matches, you can also view synthetic data. This gives you an insight into how your data might look and helps you make a better selection of entities.
Viewing synthetic data
Before connecting to real data, you can use the View Synthetic Data option to view a sample dataset.
To view synthetic data:
-
Expand DataSet, and then click Synthetic Data.
Or, if you are on the Entity Matches page, you can switch the View Synthetic Data option on.
After analyzing the entities and datasets, if you want to make changes, follow the next step.
-
To select a match of your choice, click Unselect, and then click Select next to the desired table.
It sets the table to be used before you export or publish. This allows you to override the recommended top‑match table.
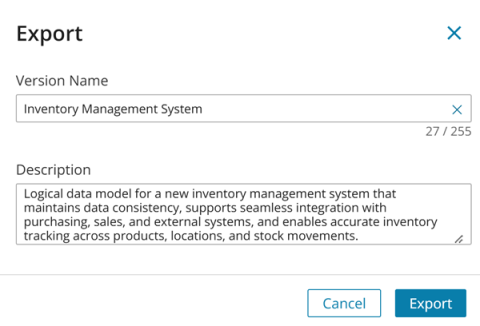
Exporting a model
You can export any version of your model. Exporting creates a copy in your integrated application, such as the erwin Mart Portal on cloud. If the model is not already saved, the system saves when you export.
To export a version of your model:
-
Expand More Actions, and then click Export.
The Export dialog appears.
-
Verify or update the details, and then click Export.
After you export the model, you can find it in the Automated Data Product Factory folder in erwin Mart Portal on cloud. You can then review key details such as the model name, version number, creation date, last revision date, and, if applicable, the percentage match score compared to other models.
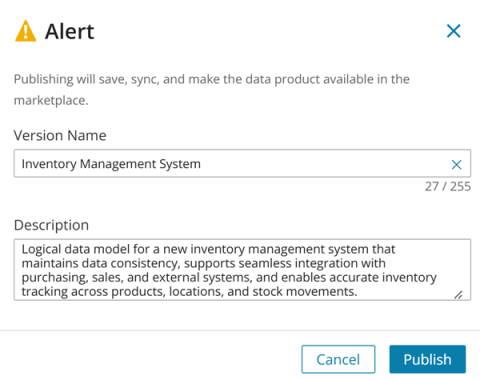
Publishing a model
Publishing a model streamlines its registration in the connected Data Intelligence catalog and prepares it for use as a data product in the Data Marketplace.
To publish a version of your model:
-
Click Publish.
The Alert message appears.
-
Verify or update the details, and then click Publish.
The published data product model can now be accessed from the Data Marketplace for further use.
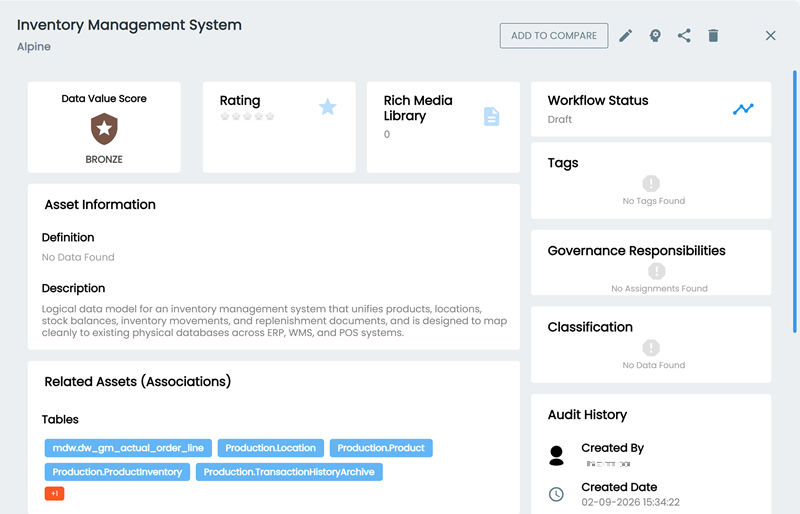
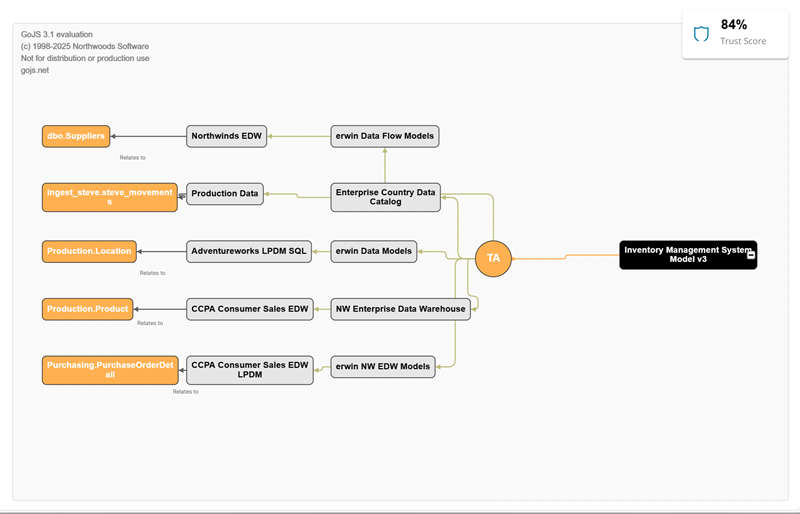
Viewing a mindmap
Once published to the Data Marketplace, you can also view the mindmap of your model in Automated Data Product Factory.
To view the mindmap:
-
Expand DataSet, and then click Mindmap.
The mindmap of your model appears. It displays the tables and their sources.