Creating Projects
Projects store and categorize maps in a hierarchy, Projects > Mappings. You can create a project, specific to an ETL tool and specify:
- Project description
- Project manager
- Business sponsor
- Cost center
- IT sponsor
To create projects, follow these steps:
- Go to Application Menu > Data Catalog >
- Under the Workspace Mappings pane, right-click the Projects node.
- Click Create Project.
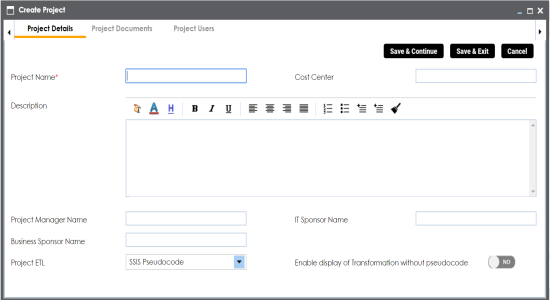
- Enter appropriate values in the fields. Fields marked with a red asterisk are mandatory. Refer to the following table for field descriptions.
- Click Save and Exit.

The Create Project page appears.
|
Field Name |
Description |
|---|---|
|
Project Name |
Specifies the name of the project. For example, Data Lake Migration. For more information on naming conventions, refer to the Best Practices section. |
|
Description |
Specifies the description of the project. For example: The project contains the mapping specifications for the sales data migration. |
|
Project Manager Name |
Specifies the project manager's name. For example, John Doe. |
|
Business Sponsor Name |
Specifies the business sponsor of the project. For example, ABC Consulting Services. |
|
Project ETL |
Specifies the ETL tool assigned to the project. For example, Informatica Pseudocode. |
|
Cost Center |
Specifies the cost center of the project. For example, Finance and Accounting. |
|
IT Sponsor Name |
Specifies the IT sponsor of the project. For example, XYZ IT Services. |
|
Enable display of Transformation without pseudocode |
Specifies whether the transformation is displayed without pseudocode. Switch Enable display of Transformation without pseudocode to Yes to display transformation without pseudocode. |
A new project is created and stored in the project tree.
Once a project is created, you can do the following:
|
Copyright © 2020 erwin, Inc.
All rights reserved.
|
|