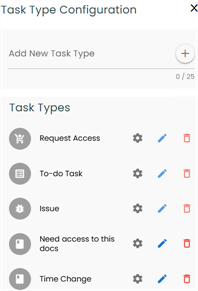
You can configure task types to categorize tasks. By default, three task types, To-Do Task, Request Access, and Issue, are available. You cannot edit or delete these task types. Additionally, you can create custom task types depending on your requirements.
To add custom task types, follow these steps:
- In the utility section, click
 .
. - In the Add New Task Type box, enter a new task type and then click
 .
. - Configure Task Type (
 )
) Use this option to configure task types.
- Edit (
 )
) Use this option to edit task types.
- Delete (
 )
) Use this option to delete task types.
- Click .
-
Field Controls: This pane displays the available UI elements.
-
Configure Form: Use this pane to design forms using the UI elements available in the Field Controls pane.
-
Configure Form: Use this pane to view and edit the properties of the UI element selected in the Configure Form pane.
- Click Edit.
- Double-click or drag and drop the required UI elements from the Field Controls pane to the Configure Form pane.
- Select the required UI element one at a time and edit their properties in the Properties pane.
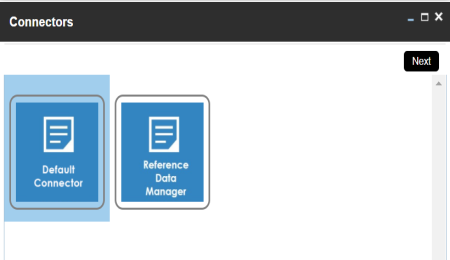
- Default Connector: Use this option to enter option values manually or using an MS Excel file.
- Reference Data Manager: Use this option to pull option values from reference tables in the Reference Data Manager.
-
Click Save.
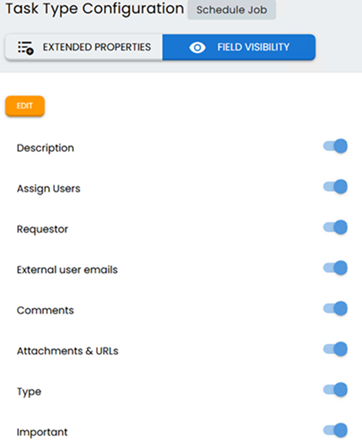
- Click the Field Visibility tab. It displays the default fields available for the task type.
- Click Edit.
- To make fields visible, switch on the required fields.
- Click Save.
- In the Configure Form section, click the required UI element.
- In the Properties section, click Configure.
- On the Connectors page, ensure that the Default Connector option is selected. Then, click Next.
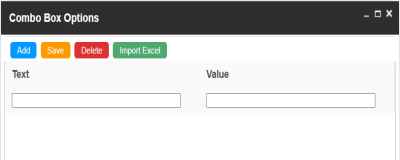
- Use the following options:
- Add
- Use this option to enter text and value manually.
- Import Excel
- Use this option to import options from MS Excel files.
- After configuring option values, click Save.
- Click Add.
- Enter values in the Text and Value fields.
- Click Save.
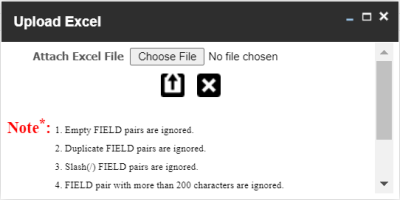
- Click Import Excel.
- Click Choose File and select the required MS Excel file.
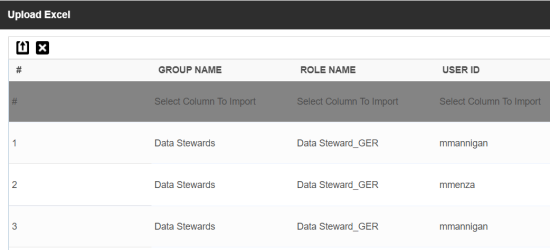
- Double-click the Select Column To Import cell in the required column.
- Select the appropriate option.
- Click
 .
. - Click Save.
- In the Configure Form section, click the required UI element.
- In the Properties section, click Configure.
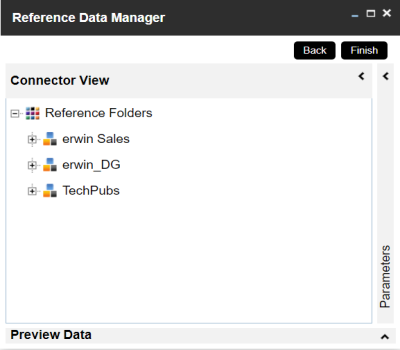
- On the Connectors page, click Reference Data Manager and then click Next.
- In the Connector View pane, expand a reference folder and select a reference table.
- In the Parameters pane, click the radio button next to the required column.
- Click Finish.
- Under the Properties section, switch Load on Startup to ON.
- Click Save.
The Task Type Configuration pane appears and displays a list of available task types.
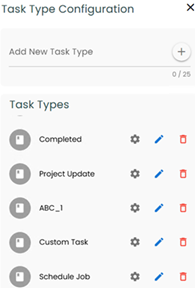
The task type is added to the list of available tasks.
For example, in the following image, a task type, Schedule Job is added.
Use the following options to manage task types:
To configure task types, follow these steps:
The Task Type Configuration page appears. By default, the Extended Properties tab opens.
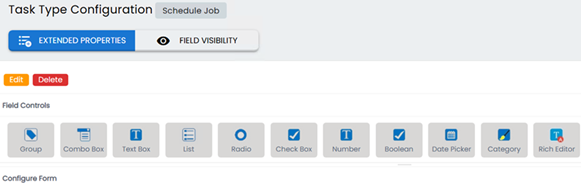
The Extended Properties tab contains the following sections:
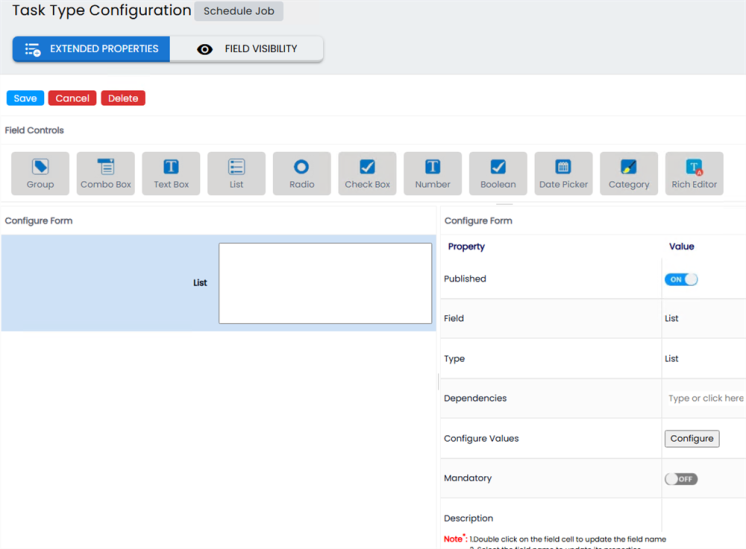
The available properties differ based on the type of UI element.
Refer to the following table for property descriptions:
|
Property |
Description |
|---|---|
|
Published |
Switch the Published option to ON to publish the field. |
|
Field |
Specifies the field label. To change the field labels, double-click the corresponding Value cell. For example, List. |
|
Type |
Specifies the type of the field. To select field types, double-click the corresponding Value cell. For example, List. |
|
Dependencies |
Defines the pick list fields that can be used as controlling fields. It works only with the Reference Data Manager connector. To define pick list fields, select the fields from the drop down list. |
|
Configure Values |
Specifies the connectors for the field. To enter option values, click Configure. Use the following options: |
|
Mandatory |
Specifies whether the field is mandatory. Switch the Mandatory option to ON to make this field mandatory in a form. |
|
Description |
Specifies the field description. To enter field descriptions, double-click the corresponding Value cell. |
|
Order |
Specifies the order of the field on the Extended Properties tab. To enter the order number, double-click the corresponding Value cell. You can also drag and move fields in the Configure Form pane to change their order. |
The form is saved and available on the Extended Properties tab.
To configure field visibility, follow these steps:
The fields are configured.
When you configure extended properties using UI elements, such as combo box, radio button, and list, you also need to configure their option values. You can use the default connector to import option values from an MS Excel file or enter them manually.
To configure option values using the default connector, follow these steps:
Ensure that you are in edit mode.
The Connectors page appears.
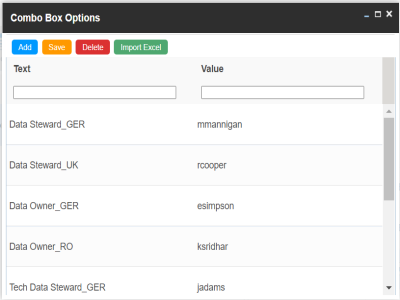
The <UI_Element> Options page appears. For example, if the UI element is Combo Box, the Combo Box Options page appears.
To add option values manually, follow these steps:
The Text corresponds to options whereas the Value corresponds to underlying value of an option. You can add as many values as needed.
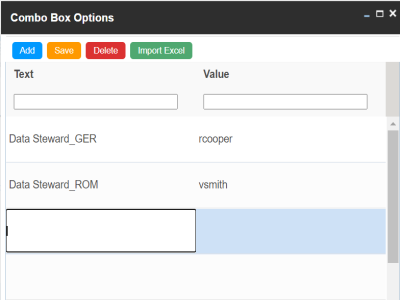
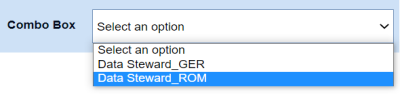
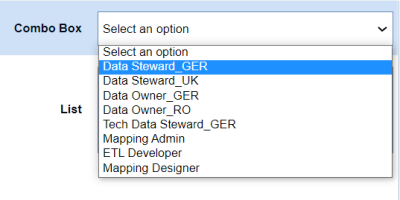
The option values appear in the UI element under the Configure Form section.
To import option values from MS Excel files, follow these steps:
The Upload Excel page appears.
The Upload Excel page appears. It displays the data in the MS Excel file.
The available options appear.
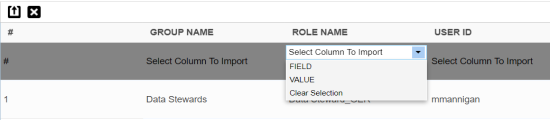
Field corresponds to options and Value corresponds to value of an option. You can import multiple columns. Use Clear Selection to undo the selection.
The <UI_Element> Options page appears. It displays the imported columns. You can delete a row that is not required. To delete rows, click a row and then click Delete.
The option values appear in the UI element under the Configure Form section.
When you configure extended properties using UI elements, such as combo box, radio button, and list, you also need to configure their option values. You can use the Reference Data Manager connector to import option values from tables in the Reference Data Manager.
To configure option values using reference data manager connector, follow these steps:
Ensure that you are in edit mode.
The Connectors page appears.
The Reference Data Manager page appears. It displays the reference folders in the Connector View pane.
The Parameters pane displays the columns in the reference table. You can also click Preview to view the data in the reference table.

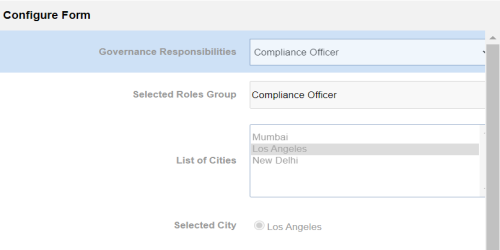
You can select the controlling field from the drop down option. Ensure that you define the required dependencies in the Properties pane and that the option values for controlling field are configured using the same reference column.
The Extended Properties Configuration page appears.
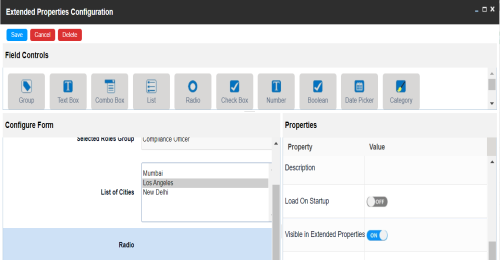
The option values are configured. For example, in the following form the List of Cities is the controlling field for Selected City. Both the fields get their option values from the same reference column.