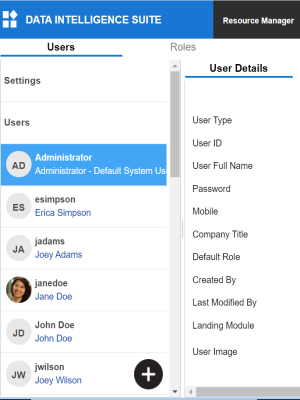
Users are used to grant members of your team access to erwin DI Suite and your projects. While a few users are available by default, you can create users for your organization using the Resource Manager. While you create users, you also assign them roles to define their access-level permissions.
The Administrator user is available by default and you cannot edit or delete this user.
To create users, follow these steps:
- Go to Application Menu > Data Catalog > Resource Manager.
- Click
 .
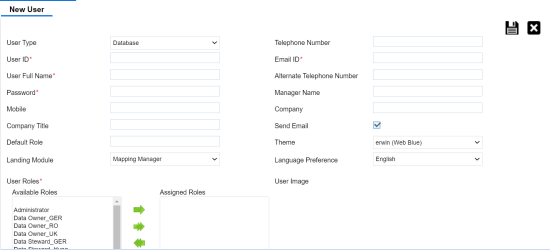
. - Enter appropriate values in the fields. Fields marked with a red asterisk are mandatory. Refer to the following table for field descriptions.
- Database: Select this option if the user authentication is through the credentials created in the Resource Manager.
- LDAP: Select this option if the user authentication is through a directory server, such as MS Active Directory, OpenLDAP or OpenDJ.
- SAML: Select this option if the user authentication is through SAML attributes.
- NON LOGIN: Select this option if the user is not required to log on to the application.
-
Click
 .
.
By default, the Users tab opens.
The New User page appears.
|
Field Name |
Description |
|---|---|
|
User Type |
Specifies whether the user type is Database, LDAP (Lightweight Directory Access Protocol), SAML (Security Assertion Markup Language), or NON LOGIN. For example, Database. |
|
User ID |
Specifies the user name of the user to log on to erwin DI Suite. For example, lmichal. |
|
User Full Name |
Specifies the user's full name. For example, Luqman Michal. |
|
Password |
Specifies the password to log on to erwin DI Suite. For example, Luqman@1. The administrator provides a default password, which can be changed later. The administrator can also enforce a password policy. For more information on enforcing password policy, refer to the Configuring Settings topic. |
|
Mobile |
Specifies the user's valid mobile number. For example, +658374414288. |
|
Company Title |
Specifies the user's company title or designation. For example, Data Administrator. |
|
Default Role |
Specifies the default role of the user. For example, Data Steward_RO. |
|
Landing Module |
Specifies the landing module for the user. For example, Mapping Manager. The Landing Module is the first page displayed when a user logs in. |
|
User Roles |
Select roles under Available Roles list-box and move them to Assigned Roles list-box using the arrows ( For adding a new role under the Available Roles list-box, refer to the Creating Roles topic. You can assign the Legacy Data Steward role to a user. This enables you to assign this user as a Data Steward in the Metadata Manager and Reference Data Manager. |
|
Telephone Number |
Specifies the valid telephone number of the user. For example, 1-800-783-7946. |
|
Email ID |
Specifies the user's email address. For example, l.michal@mauris.edu |
|
Alternate Telephone Number |
Specifies the user's valid alternate telephone number. For example, 1-802-456-7946. |
|
Manager Name |
Specifies the name of the user's reporting manager. For example, John Doe. |
|
Company |
Specifies the name of the user's company. For example, ABC Consulting Services. |
|
Send Email |
Specifies whether to send email to the user's email ID. Select the Send Email check box to send an email notification to the user's email ID. For more information on configuring notifications, refer to the Configuring Notifications topic. |
|
Theme |
Specifies the theme for the user to set the appearance of erwin DI Suite. By default, it is set to erwin (Web Blue). |
|
Language Preference |
Specifies the language preferred by the user. For example, English. For more information on language settings, refer to the Configuring Language Settings topic. |
|
User Image |
Specifies the physical image file being attached to the user. Drag and drop a user's image file or click |
A new user is created and added to the Users list.
For more information on managing resources, refer to the Managing Resources section.
|
|
|
Copyright © 2021 erwin, Inc. All rights reserved. Copyright © 2021 Quest Software Inc. All rights reserved. All trademarks, trade names, service marks, and logos referenced herein belong to their respective companies. |