You can promote data item mappings to different release environments in the Release Manager.
The promotion is reflected in the Mapping Manager and hence, it is important to assign
promote system environments (for source and target) corresponding to the release environments.
To promote data item mappings, follow these steps:
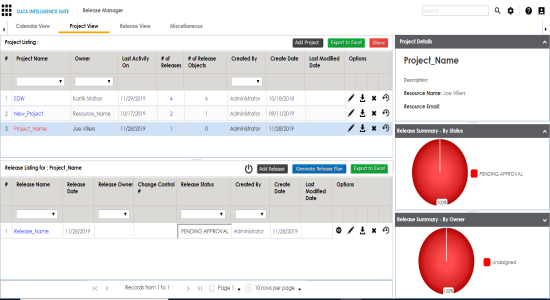
- Under the Project View tab, click the required project.
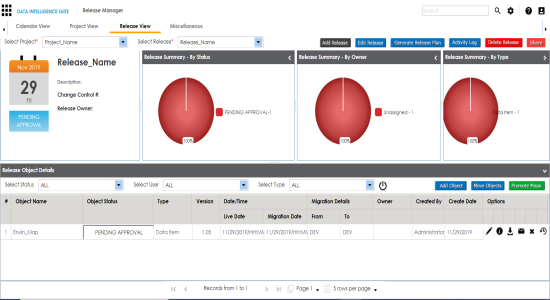
- Click the required <Release_Name>.
- In the Release Object Details section, click the required <Data_Item_Mapping_Object> and click Promote Maps.
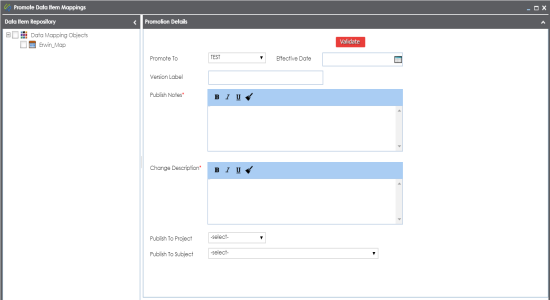
- In Data Item Repository, select the required <Map_Name> check box.
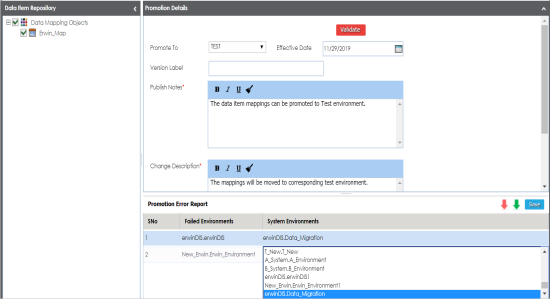
- In Promotion Details, enter appropriate values in the fields. Fields marked with a red asterisk are mandatory. Refer to the following table for field descriptions.
- Click Validate.
- Double-click the corresponding cells to select the promote system environment for the mappings.
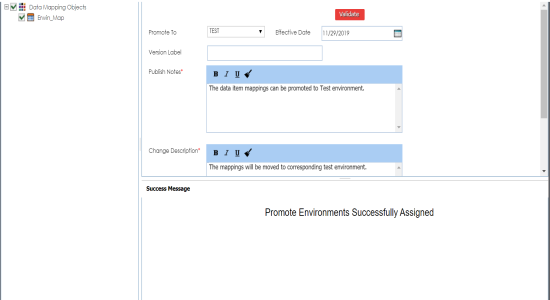
- Click Save.
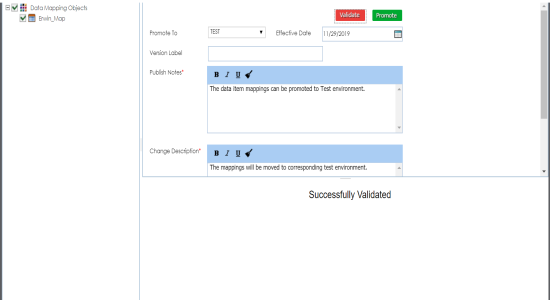
- Click Validate.
- Click Promote.
The release listing of the project appears.
The Release View tab appears.
The Promote Data Item Mappings page appears.
|
Field Name |
Description |
|---|---|
|
Promote To |
Specifies the release environment to which the release object is being promoted. For example, TEST. Select the release environment where you wish to promote the release object (data item mapping). |
|
Effective Date |
Specifies the effective migration date of the release object. For example, 04/22/2020. Use |
|
Version Label |
Specifies the version label of the release objects. For example, Beta. |
|
Publish Notes |
Specifies the notes about the publishing of the data item mapping. For example: The data item mappings should be promoted to the Adventureworks_Migration. |
|
Change Description |
Specifies the description about the changes in the data item mapping. For example: The business rule in the data item mappings was changed to ABORT. |
|
Publish To Project |
Specifies the project in the Mapping Manager to which the data item mapping is being promoted. For example, Adventureworks_Migration. |
|
Publish To Subject |
Specifies the Subject Area in the Mapping Manager to which the data item mapping is being promoted. For example, Providers. |
The Promotion Error Report appears, because corresponding promote system environments were not provided.
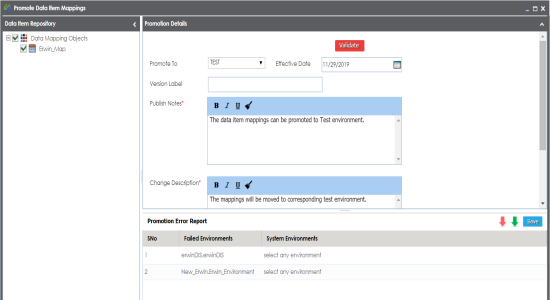
The promote system environments are assigned.
The promotion is successfully validated.
The object is promoted to the selected project.
When the data item mapping object is promoted, then it moves to the specified project in the Mapping Manager. The source and the target environment are also modified to the specified promote system environments.
|
Copyright © 2020 erwin, Inc.
All rights reserved.
|
|